

Attempting to take the ideal shot while dealing with glare is no picnic. Glare, from bright indoor lighting or sunshine reflecting off polished objects, can ruin your photos. Thankfully, glare removal from images is now easier than ever, thanks to technological breakthroughs and the help of artificial intelligence (AI). To help How to Remove Glare From Photo you take better pictures, we’ll go over some tried-and-true methods for reducing glare.
To put it simply, glare is the phenomenon wherein light, after reflecting off of objects, enters the camera lens in the form of bright spots or streaks. Portraits, landscapes, and still life compositions are all susceptible to this phenomenon, which can happen indoors or outdoors. Glare can be caused by a variety of things, the most common of which are windows, water, glass, and artificial lights.
Ways to Eliminate Glare:
1. Modifying Camera Settings:
Think about changing your camera settings to reduce glare before taking a picture. Try lowering the reflected light intensity by adjusting the shutter speed, aperture, and exposure compensation. To further improve picture quality and reduce glare, try situating yourself or your subject from different angles.
2. Polarising Filters:
These handy add-ons may do wonders for your images by reducing glare and increasing contrast. The camera lens is equipped with these specialized filters, which can be turned to block certain angles of polarised light. You may carefully remove glare from reflecting surfaces with a polarising filter, all while keeping your subject’s clarity and detail intact.

- Post-processing software with AI features provides effective solutions for glare removal in the modern digital era. Software with sophisticated algorithms may automatically identify and remove glare from images; examples include Adobe Photoshop, Lightroom, and a number of mobile applications. To get the best results, users can tweak the brightness, contrast, and color balance with these tools.
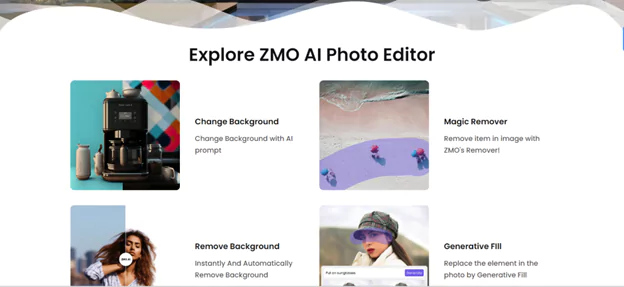
If you are looking for how to remove glare from photos, your best solution is ZMO AI, which offers a portfolio of functional tools and first grade AI capabilities. Let’s look at the best ZMO tools for glare removal
How to Remove Glare from Photo With ZMO AI
If you have just heard about ZMO AI, then you are in luck because we will go over all the transformative tools and solutions driven by ZMO.ai for making photos shine. These systems are able to How to Remove Glare From Photo intelligently assess photos, detect glare patterns, and make precise adjustments to bring back clarity and color using machine learning algorithms. Easy and quick ways to improve your photos abound with AI-powered solutions, which provide customizable settings and intuitive user interfaces.

Just imagine yourself taking a breathtaking scenery shot with a tranquil lake, only to have the glare ruin the shot. Remove glare and see the scenery’s pristine reflection with the help of editing tools powered by artificial intelligence.
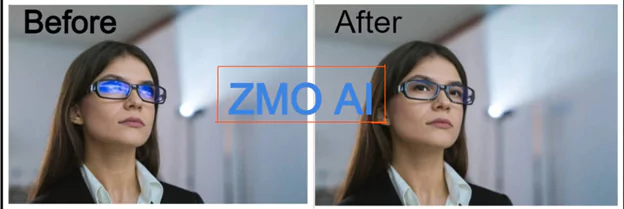
Glare spots on a subject’s face can be a major issue in portrait photography when shooting via a window. To make the lighting look more appealing and natural, you can use polarising filters or post-processing software to reduce the glare.
That’s enough talk for now, let’s hop on the train of removing glares with ZMO AI. To do this, we will use two methods but we prefer the second method.
First Method
Go to the ZMO homepage and click on the product dropdown menu. From the list of options provided, choose the tool labeled “Magic Remover”.

The click will propel you to the magic remover work page, similar to the image below:
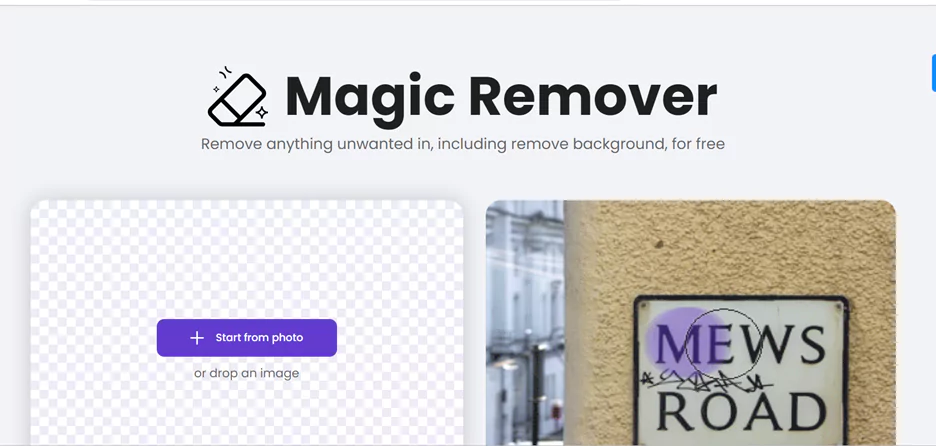
Click on the “drop an image” section and proceed to upload the peculiar image you want to rectify.
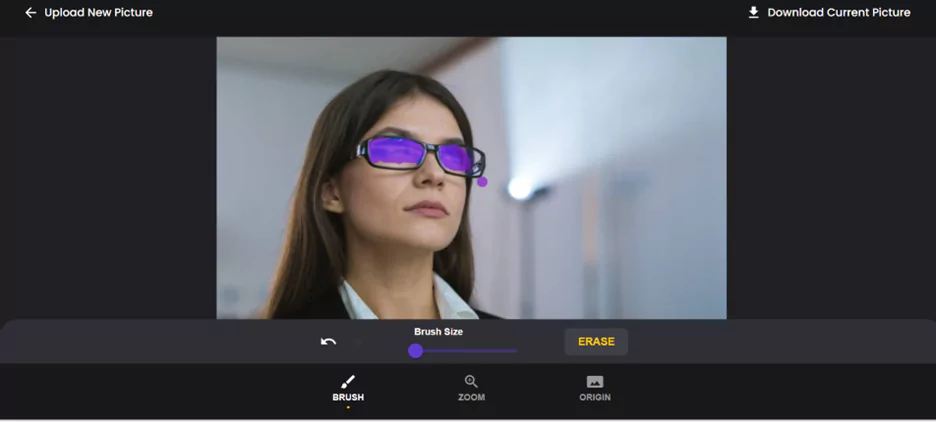
After uploading your image, a new interface is displayed for you to mark the areas by selecting the specific brush size.
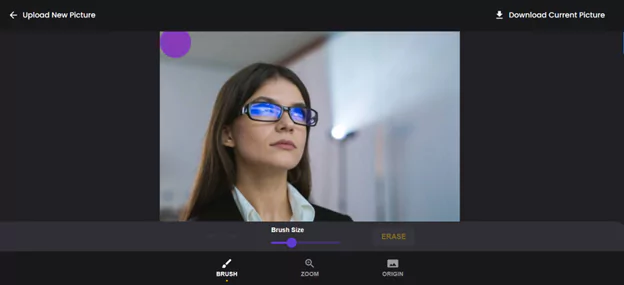
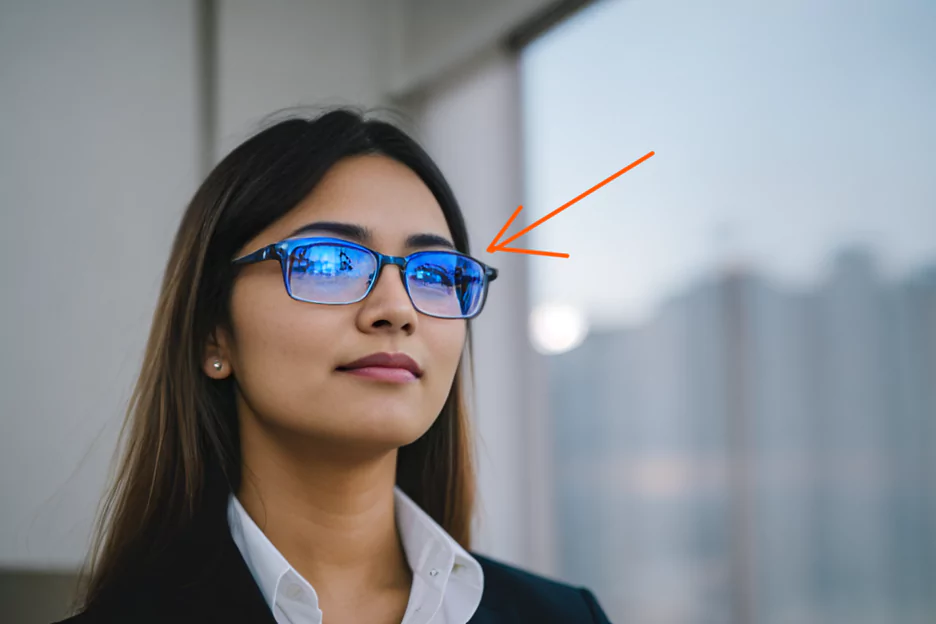
Different areas of the picture would require appropriate brush sizes so be careful in choosing them to get the best result. You can also erase a part or places where you have made mistakes. For our image, we are only interested in the glare/reflection in the glass frame hence we are only marking the affected areas.
Results:


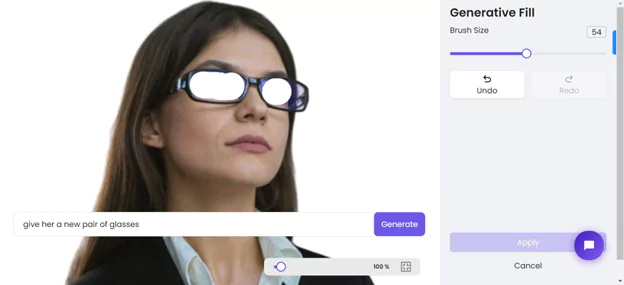
Second Method:
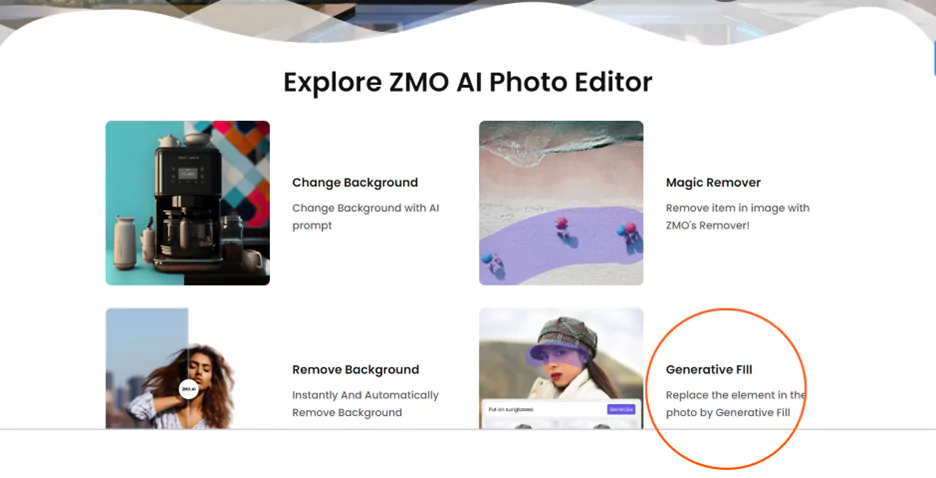
- Go to the ZMO homepage and click on the product dropdown menu. From the list of options provided, choose the tool labeled “AI Photo Editor”.

- A page such as the one below will load when you click the AI Photo Editor option:
- Select the “Generative Fill” function on the page and go to the new page.
- The next step is to upload your picture to the website and allow ZMO to work its magic

- After uploading your picture, wait for ZMO to relocate it to the ZMO generative fill and magic remover workspace in its AI Photo Editor
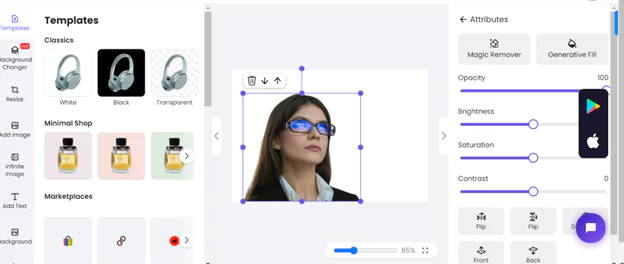
Next, Click on the generative icon on the right side of the page
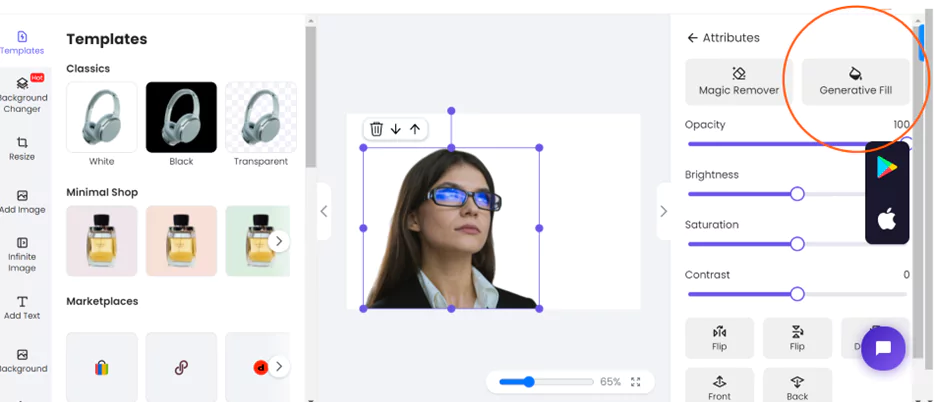
- Select the brush size and proceed to map out the areas you want to edit. Now, type in the edit you want to see in the prompt box below and click generate to see your new image processed by ZMO.
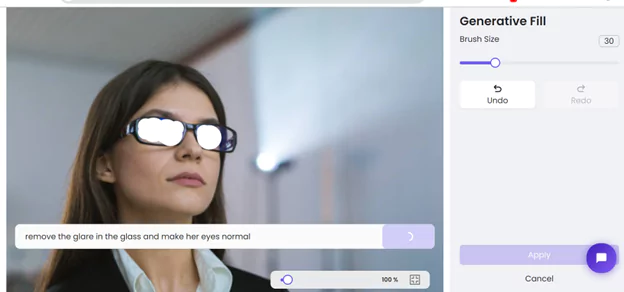
Result:
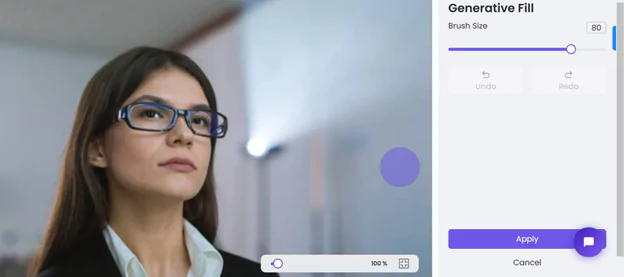

Comparison:

Frequently Asked Questions:
1. How to Remove Glare From Photo?
Our modern algorithms are designed to identify and remove glare with great care, guaranteeing flawless outcomes while preserving the integrity of the image. Quickly eliminate glare without sacrificing photo quality with ZMO AI’s targeted adjustments and exact analysis. Capture breathtaking visuals that will captivate visitors.
2. Is prior editing experience necessary to utilize ZMO AI for glare removal?
In fact, the ZMO AI has an intuitive design that makes glare removal a breeze, so photographers of all skill levels can use it with ease. Users with little to no technical knowledge or editing expertise can produce professional-quality outcomes with the help of ZMO AI’s user-friendly controls and guided workflows.
3. How fast can I eliminate glare from my photos using ZMO AI?
Glare may be easily and quickly removed with the help of ZMO AI’s complex machine learning techniques. Photographers can now improve numerous photographs simultaneously, streamlining their workflow. You may get professional results with little to no effort and time invested by using ZMO AI to expedite the editing process.
Wrap Up
When it comes to photography, glare can really take away from the beauty of our images. Nevertheless, ZMO AI enables photographers to effortlessly overcome this obstacle. With the help of cutting-edge algorithms, How to Remove Glare From Photo with ZMO AI efficiently identifies and removes glare from images, ensuring that the integrity of the image is maintained while improving its clarity. Using ZMO AI, photographers can tap into their creative potential, creating captivating photos that truly shine with brilliance and precision. Experience a world of limitless photographic possibilities with ZMO AI, eliminating all glare-related frustrations.