
Are you looking for a solution for how to take a professional headshot with high efficiency? Creating a good first impression is crucial when decorating your profile. If you’re seeking a new, professional headshot for your online platform and social media accounts, this article could be of assistance.
In this piece, we’ll examine several critical aspects of using ZMO’s AI photo editor to take a professional headshot. You may initially find it daunting due to a lack of editing experience. However, by adhering to a few straightforward steps, you too can create your own professional headshot.
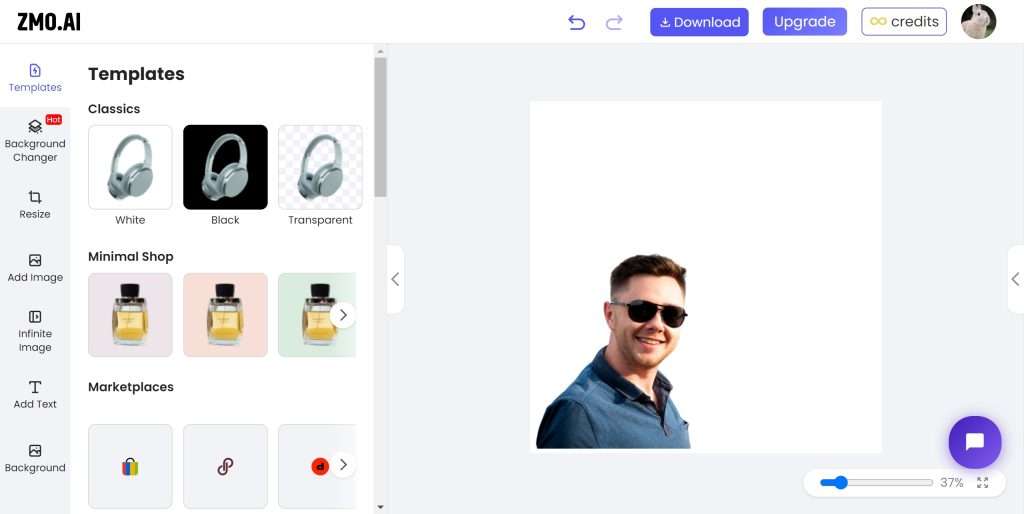
How to take a professional headshot for original photo
Taking a professional headshot relies heavily on original photography as it is a crucial factor influencing the final image. By following these simple suggestions you can easily get a professional boost on the image you have taken.
Soft, natural light can make your photo edit easily.
For at-home headshots, lighting plays a paramount role. Stand near a window to leverage the soft, diffused sunlight. This enables a clear and sharp snapshot. It also helps prevent severe shadows and unattractive angles that could compromise your appearance. This is key factor for how to take a professional headshot.
Opt for flattering light, preferably outdoors, as natural light is most effective. Avoid using indoor office lighting for portraits, as it can often cast unflattering green hues and shadows due primarily to fluorescent bulbs. Moreover, most offices tend to be too dark, leading to the production of grainy images unless a flash is used. However, it’s advisable not to use flash, as it can cause red-eye and potentially wash out facial features.
For indoor photography, a ring light can greatly enhance your lighting conditions. While outdoor natural light is typically preferred, factors such as weather and time of day (with early morning or late afternoon offering the best light) can impose restrictions. Using a ring light serves as an excellent workaround, replicating daytime lighting and minimizing unwanted facial shadows. Here are three suggested techniques to obtain optimal results from a ring light:
- Position the light at one side of your face.
- Ensure the light is situated slightly above your eye level.
- Employ a plain whiteboard on your lap to bounce the light back onto your face.
Choose Simple and cool-color background
If you want to own a unique professional headshot, background is also a important factor that it can decide all the tone of the image. Therefore you need to find simple and cool color for taking the headshot, otherwise it will makes your image messy by complex item or the attraction of the viewer will be caught by flamboyant scenes. However, you may confused that I don’t know how to find a suitable background for my headshoot and it is hard for me for the rigorous requirement. Here comes the easiest way that you can use the ZMO’s AI photo editor to remove background and change the background. It support you to change the background with its AI calculating. Although how the picture complex, you can easily change the background whatever you want.
Change background with few clicks with Free AI PHOTO EDITOR
Select the most appropriate gesture and various angles
Identify a pose that accentuates your attributes while ensuring your comfort. Below are a few uncomplicated suggestions for posing for your professional headshots.
- Set up your camera and walk back. Rotate your upper body slightly diagonally, making sure to keep your face oriented towards the camera. This pose gives your body an appealing angled appearance, steering clear of a broad, boxy look. Your hands can remain at your sides or you could pose with your arms crossed over your chest. If it feels more natural, you can also slip one hand into your pocket.
- Keep you back straight and your shoulder relax. Keep a little leaning toward your camera. It will make you slim in the photo without double chin.
- Try different angles and the distance from the camera. Some enchanting photo are shot without noticing. Therefore you need to try many times to get the best angles and pose for the best effect.
Tips: Offer a friendly smile, demonstrating to others that you’re approachable and maintain a positive demeanor!
How to take a professional headshot of AI photo editing
Once you follow the above suggestions. I trust you can take your own unique original headshot. Now let’s us start to edit the photo with ZMO’s AI photo editor. ZMO’s AI photo editor can be able to give your answer on how to take a professional headshot. Click here to enter ZMO’s AI photo editor for free using.
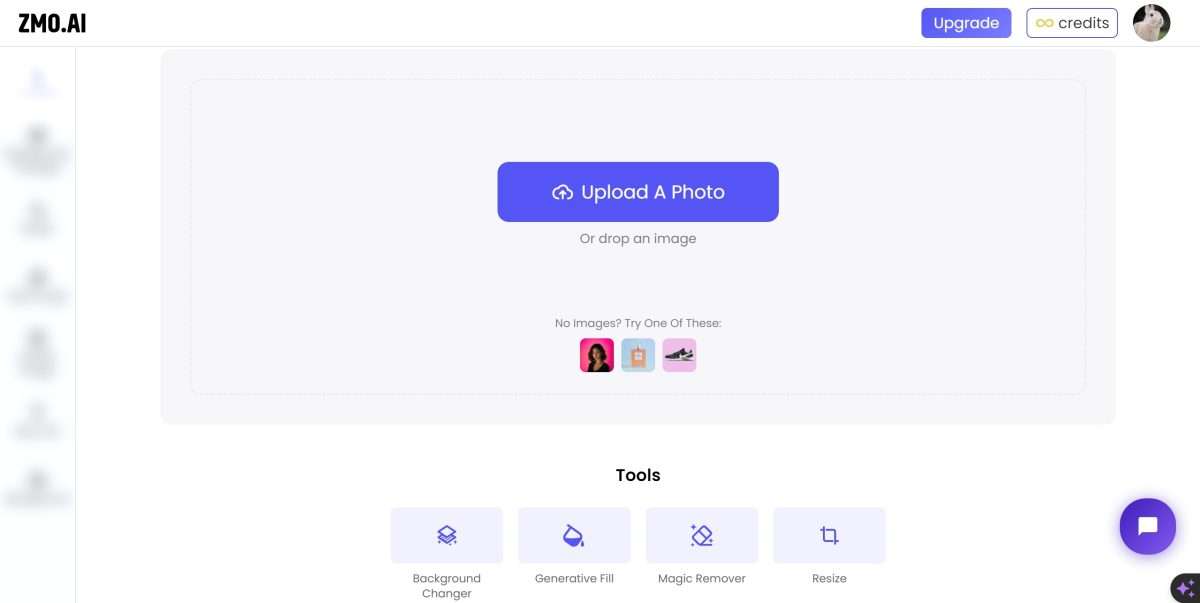
Upload your the photo you took
Get yourself set and brace for the remarkable experience that you will encounter by making use of our groundbreaking AI photo editor. The first step involves simply logging into our system. You’ll find that it’s a straightforward process that establishes a secure session with our platform and prepares you for the journey that lies ahead.
After logging in, upload your chosen photo. Our advanced AI can enhance any image brilliantly. Once uploaded, our stunning AI editor transforms your image into an artwork swiftly. The transformation is swift, cutting short your anticipation. Soon, you’ll view your edited photo, elevated by the prowess of AI into an artistic masterpiece in seconds.
Remove and change the photo background
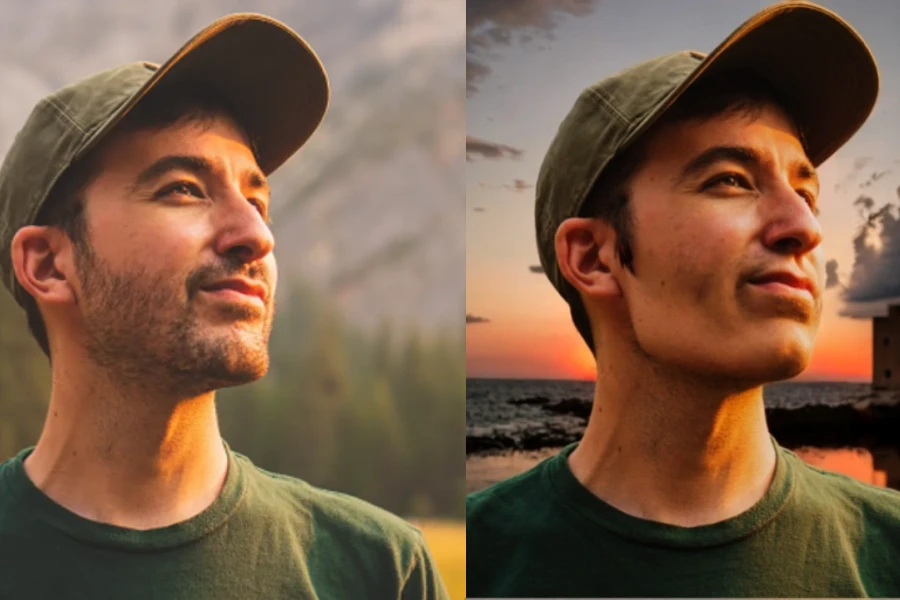
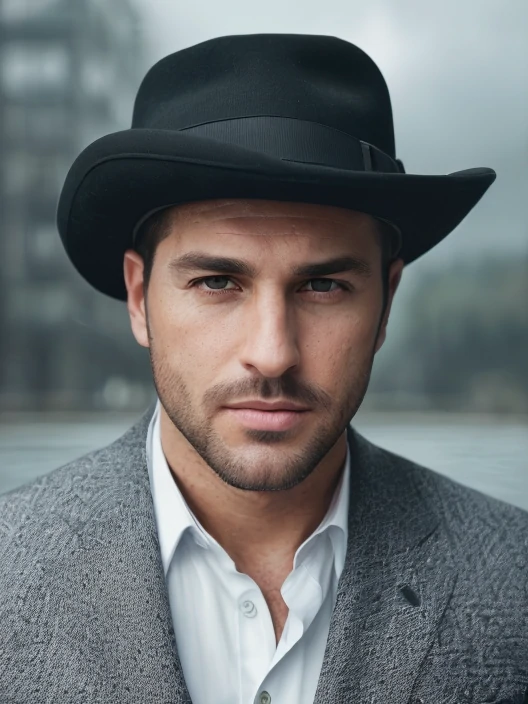
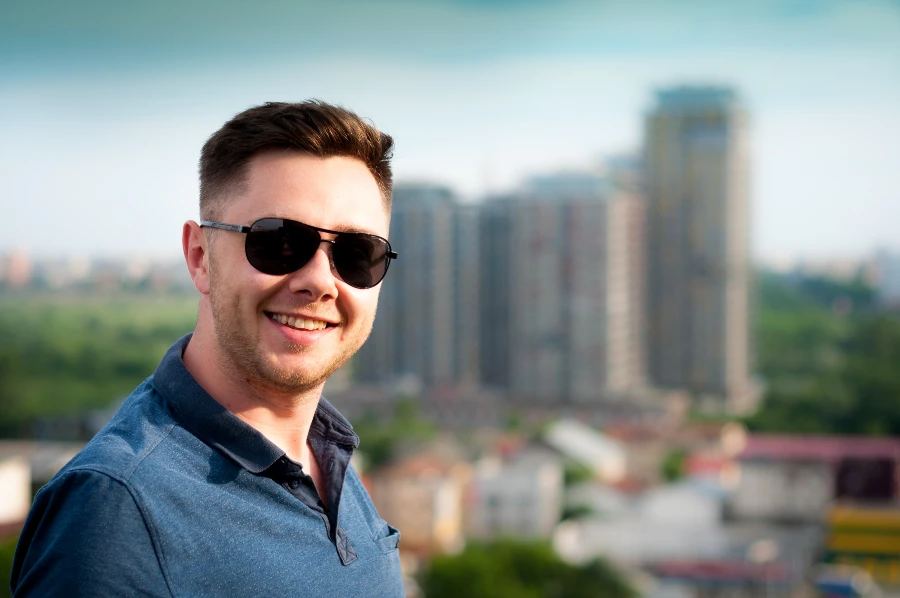
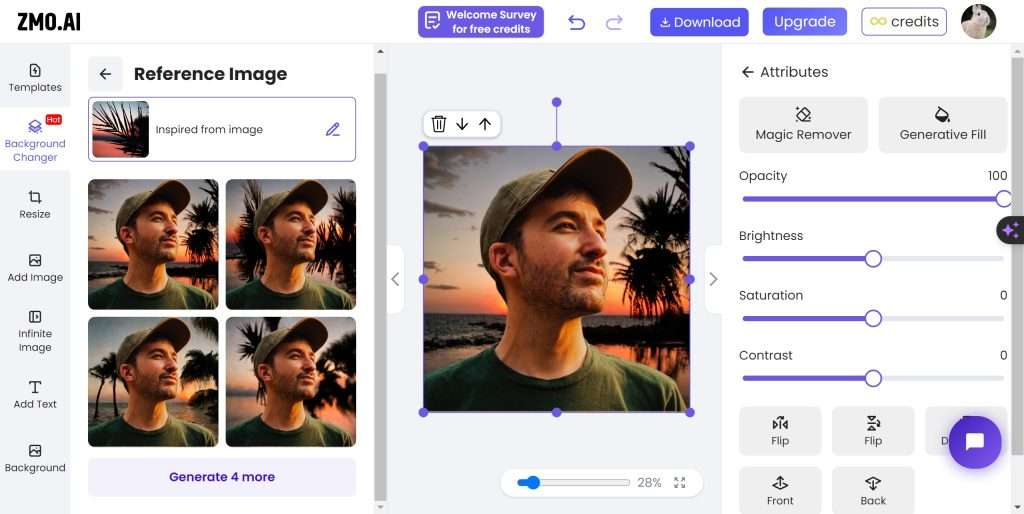
In order to follow your step, So I choose two photo shown in the picture. You can easily follow my guidance and make your professional headshot step by step. And I choose the look up man under the sunset light and the man smiling with blur background. And we upload the photo into the ZMO’s AI photo editor.
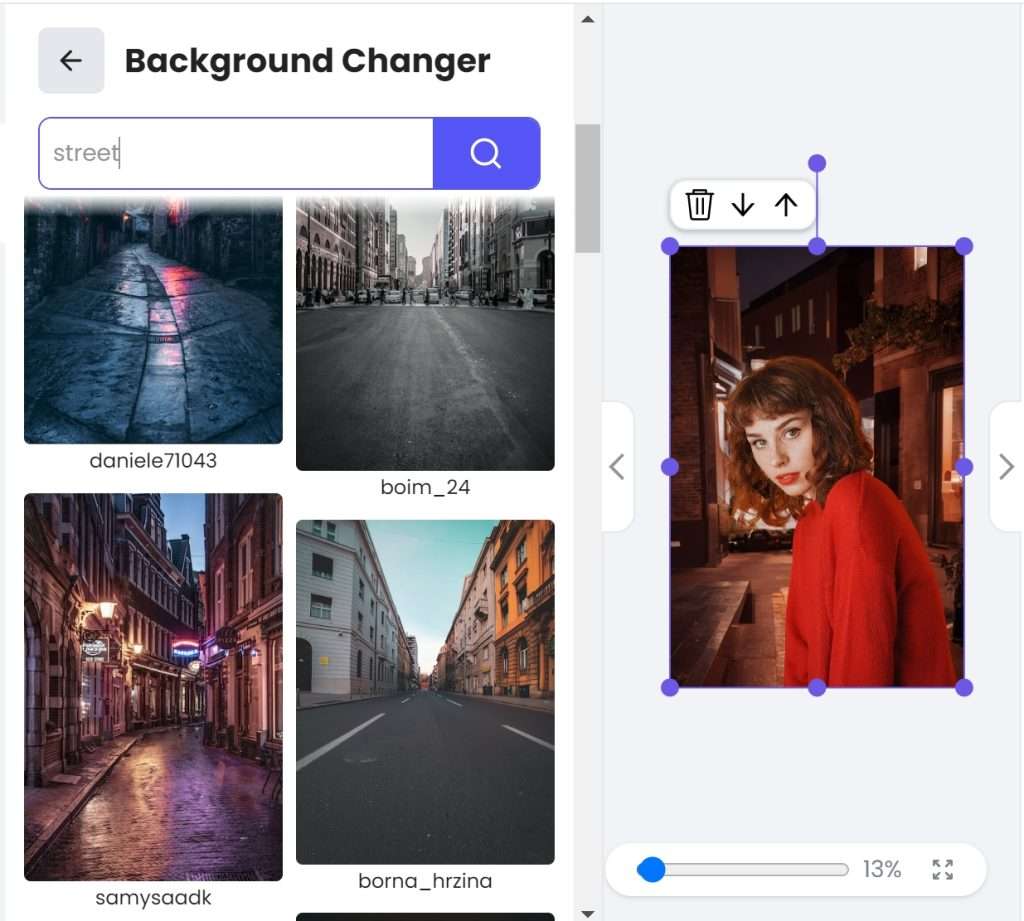
Man under sunset
Smiling Man
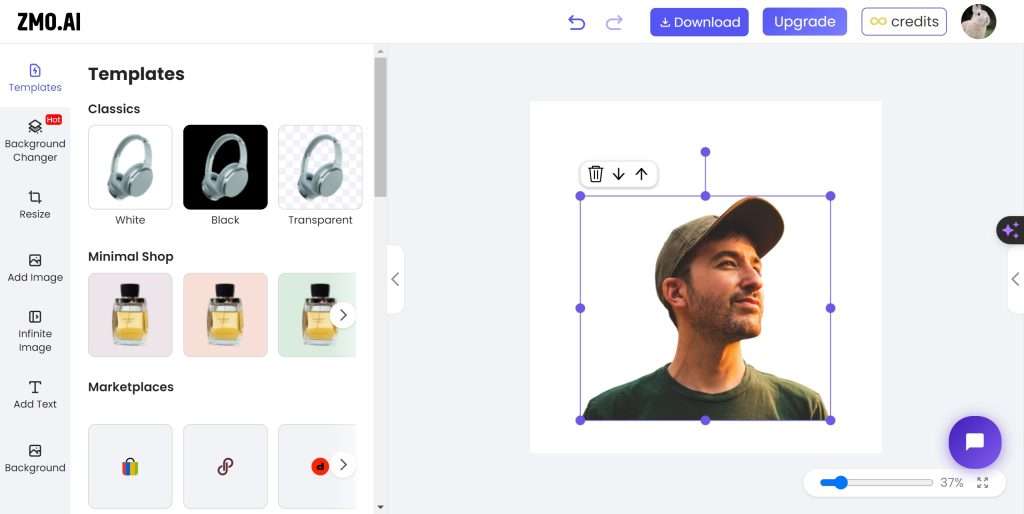
Once you’ve uploaded your image, the ZMO’s AI-driven photo editor will automatically remove the background. There’s no need to fret over the image editing process. The AI system can effectively identify and unload your image, and then autonomously remove the background, generating a flawless item image for modifying the background. Therefore, there’s no cause for concern over the background removal – just concentrate on the lighting to capture the perfect original photo.
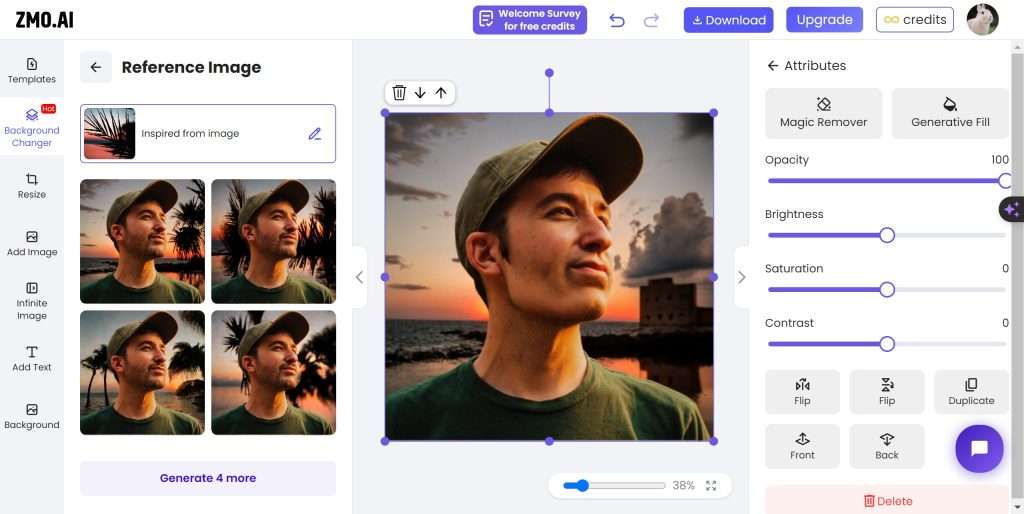
After you upload the photo, you need to consider what the background is suitable for your photo. If you have no idea about choosing the background, ZMO’s AI photo editor also can recommend you different background. For example, I want to put the sunset man into a sunset beach situation.I click the change background and search sunset beach. It shows many choice for you to select.
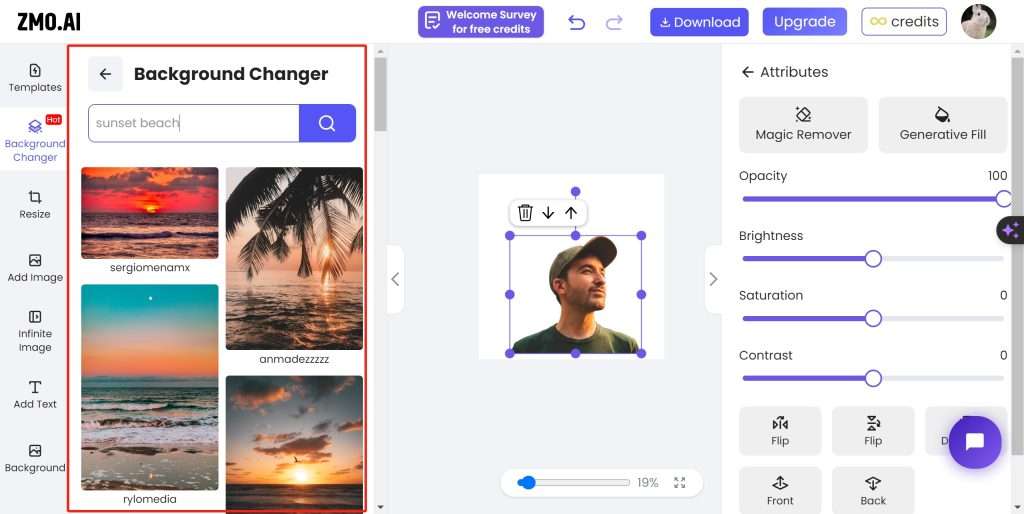
A standout feature of ZMO’s AI photo editor is the background changer. You get to select a background that suits your taste. The program will then inspire you with four different variations of your choice. This multiplicity of options allows users to add a more natural look to their photos.
Now you have done the work of editing your professional headshot, you just finish your work with 2 clicks, upload your photo, change background, that’s all. Therefore it is easy to edit the photo with the ZMO’s AI photo editor no matter who you are. ZMO’s AI photo editor can perfectly solve how to take a professional headshot.
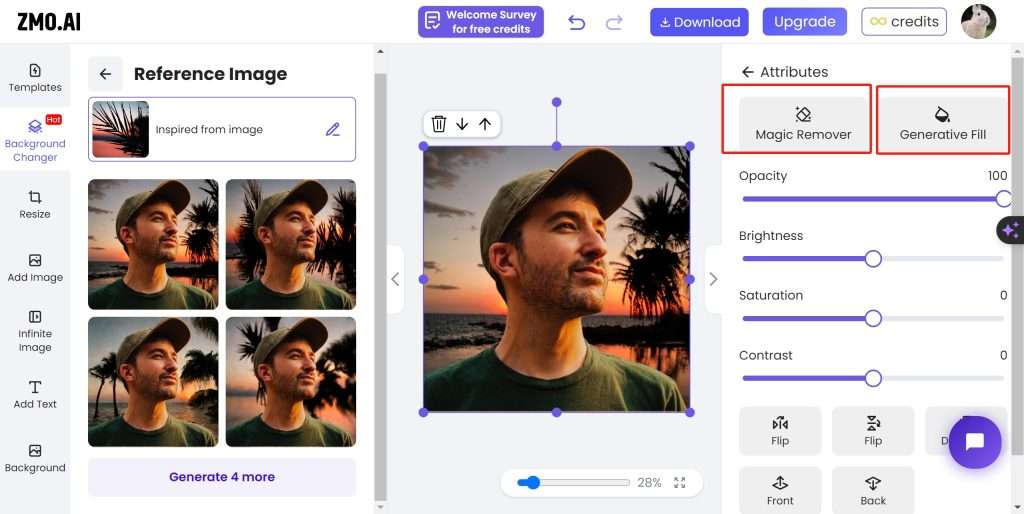
For the further, if you don’t like or want to remove the extra item in the AI generated picture and you can click the magic remover. If you want to add some item to decorate yourself or decorate background, you can click the generate fill
Magic remover for how to take a professional headshot
In this function we can try the remove the tree in the picture. On the right of the picture, you can see some palm trees. So this time we try magic remover to remove the tree.
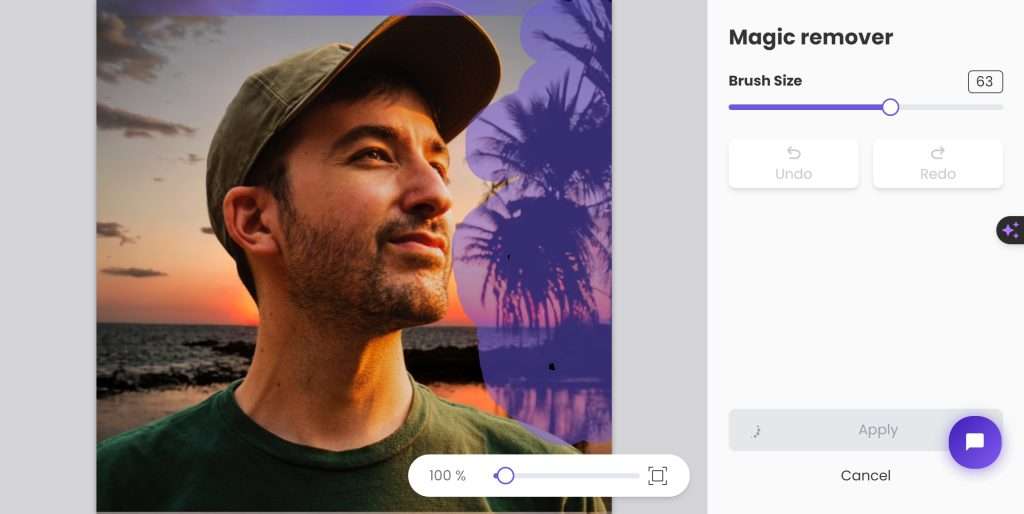
Click the magic remover widget and mask the tree. Then the photo is generated.

All work finished!
Generative fill for how to take a professional headshot
Sometimes it is hard to add some and adjust items in the headshot. If you want to add extra item into the photo, you have to use PS and cost a lot of time to adjust the photo. So in this time we try to shear the beard of this man under sunset by using generative fill. Now let’s click the generative fill and enter the generative fill function.
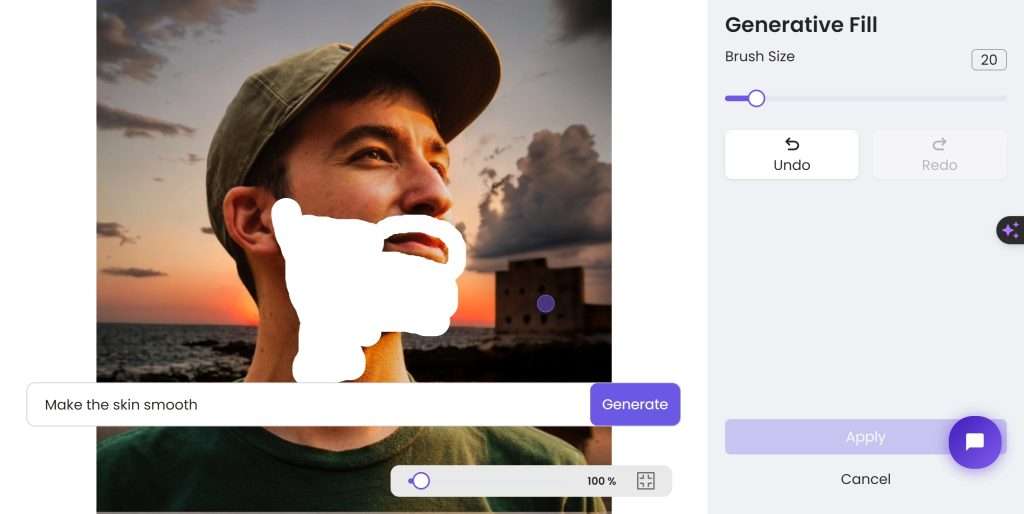
Adjust the brush size and mask the beard area. Next you type what you want in the generate table. Then click the generate button to generate the edited photo.
Finished! Here you can get the professional headshot for using with few seconds!
Conclusion
In conclusion, taking a professional headshot is an essential step in establishing your personal brand and making a strong impression in today’s digital world. With ZMO’s AI photo editor, you can easily enhance your headshot and achieve a polished, professional look. From adjusting lighting and removing blemishes to enhancing colors and adding artistic effects, ZMO offers a wide range of tools to ensure that your headshot stands out from the crowd. So why settle for anything less than perfection? Try ZMO’s AI photo editor today and take your professional headshot to the next level. Your career will thank you for it.
FAQS
1. Is ZMO.AI suitable for beginners?
Yes, ZMO.AI’s platform is designed to be user-friendly and intuitive, making it suitable for beginners, while retaining the robustness needed for professional use.
2. What kind of photo editing tools does ZMO.AI offer?
ZMO.AI offers ZMO AI Models, Remover.app, and the Background Changer, with more tools and features in development for future release.
3. Does ZMO.AI offer any free services?
ZMO.AI does offer certain services for free, though it’s best to check their official website for the most accurate, up-to-date information.
4. How does ZMO.AI’s AI technology enhance my photo editing experience?
ZMO.AI’s AI technology automates complex procedures, performs tasks in seconds, and allows detailed customization, revolutionizing the photo editing process.
5. Can ZMO.AI be used professionally, such as in a business setting?
Absolutely. Professional environments, including creative agencies, photography studios, and marketing departments, can and do benefit from ZMO.AI’s advanced AI-driven tools.