
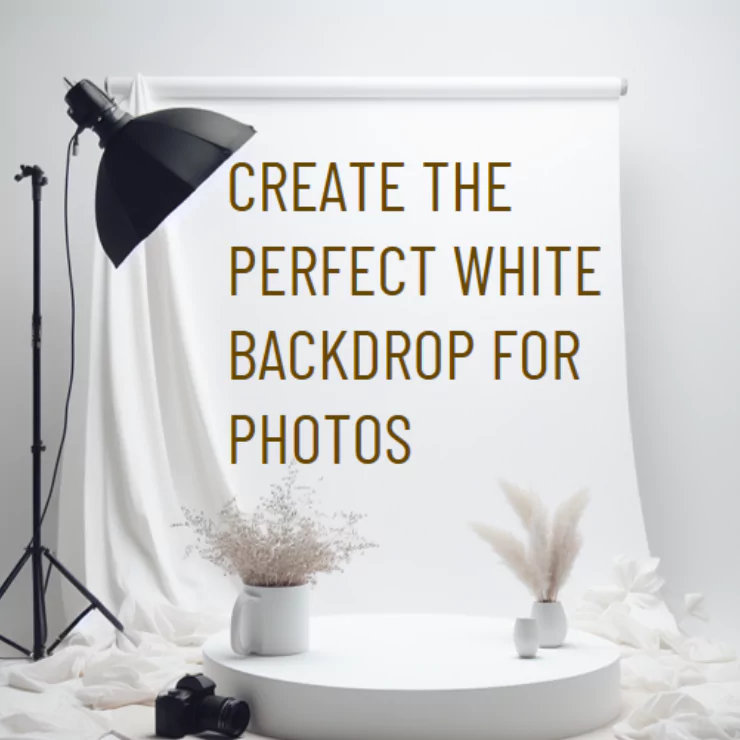
If you want to take professional-looking photos of products, portraits, or other subjects, you might want to consider using a white backdrop. A white backdrop for photos is a simple, effective way to create a clean, minimalist, and versatile background that lets the subject stand out and fit in various design contexts. In this article, we will explain what white background product photography is, why you should use it, what equipment you need, how to set up the lighting and the backdrop, how to place the products, and how to edit the photos.
What Is White Background Product Photography?
White background product photography is a type of photography where the product is photographed against a plain white background. This creates a clear contrast between the product and the background, making the product the image’s focal point. White background product photography is widely used in e-commerce, advertising, and catalogs, as it showcases product features, details, and quality consistently and professionally.
Why You Should Use White Background Product Photography
There are many benefits of using white background product photography, such as:
- It eliminates distractions and clutter from the background, making the product more visible and appealing to the viewers.
- It creates a uniform and consistent look for your product images, which enhances your brand identity and credibility.
- It makes the product images easier to edit and manipulate in post-processing, as you can easily change the background color, add shadows, or remove unwanted elements
.
- Without worrying about background compatibility, it allows you to use product images for various purposes and platforms, such as websites, social media, print media, or video.
Equipment Needed for Shooting Product Photography on White Background
To shoot product photography with a white background, you will need the following equipment:
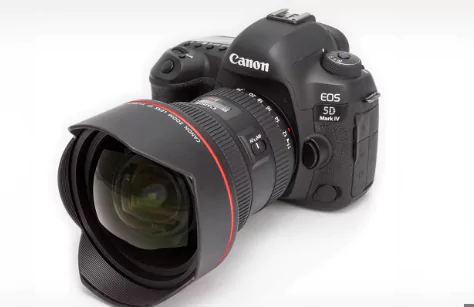
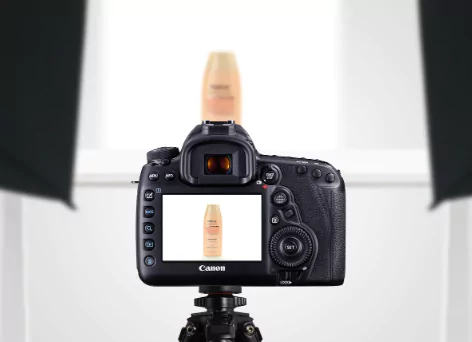
– A camera:
You can use any camera to adjust the orientation settings, such as notch, shutter speed, and ISO. A DSLR camera is preferred, as it offers more control and quality than a smartphone or a point-and-shoot camera.
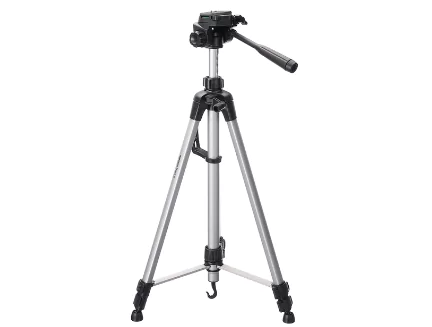
– A tripod:
A tripod stabilizes your camera and avoids blurry or shaky images. It also helps you to maintain the same angle and distance from the product throughout the shoot.
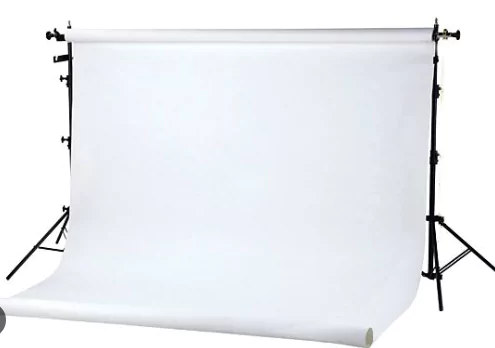
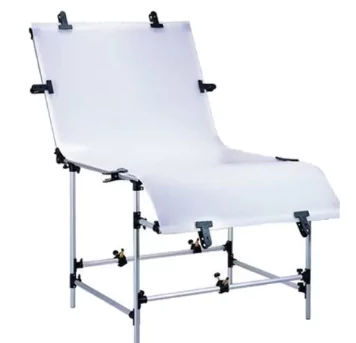
– A white backdrop:
You can use any white and smooth material, such as paper, fabric, foam board, or vinyl. You can also use a light box, a portable studio box, or a cyclorama specially designed for product photography. The size of the backdrop depends on the size of the product and the space you have.
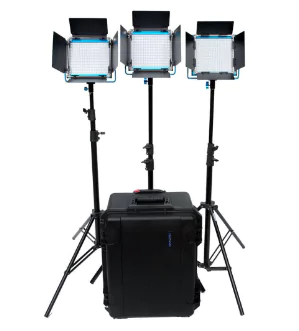
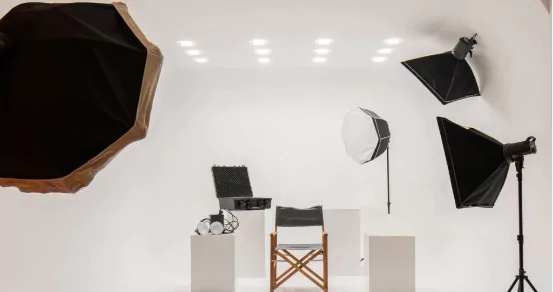
– Lights:
You can use natural, artificial, or a combination of both to illuminate your product and the backdrop. Natural light is free and easy to use but can be inconsistent and hard to control. Artificial light, such as studio lights, flashes, or LED lights, gives you more control and flexibility, but it can be expensive and complicated to set up. You will also need light modifiers, such as umbrellas, softboxes, or reflectors, to diffuse and shape the light.
– A table:
You will need a table or a flat surface to place your product and the backdrop on. The table should be sturdy and stable and preferably white or neutral in color.
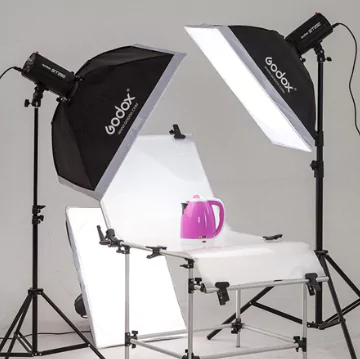
Lighting Setup for White Background Photography
The lighting setup for white background photography depends on the type and number of lights you have, but the general principle is to use two or more lights to create balanced and even lighting on the product and the backdrop. Here is a basic lighting setup that you can follow:
Place one light on each side of the product at a 45-degree angle and slightly above the product level. These are the leading lights, and they will provide the primary illumination and shadows on the product.
Place one light behind the product, facing the backdrop. This is the backlight, and it will create a bright and seamless white background. You can change the distance and intensity of the backlight to achieve the desired effect.
Place a reflector or a white card in front of the product, below the camera level. This will bounce some light back to the product and fill in the shadows and details on the front side.
How To Set up White Background
To set up the white background, you will need to follow these steps:
Set Location
Choose a location that has enough space and light for your shoot. Avoid direct sunlight, windows, or other sources of light that can create glare or reflections on the product or the backdrop.
Set Table
Set up your table and place your backdrop on it. Make sure the backdrop is smooth and wrinkle-free and covers the entire table and the wall behind it. You can use tape, clips, or stands to secure the backdrop.
Set Camera
Set up your camera and tripod in front of the table, facing the product. Modify the height and angle of the camera to capture the product from the best perspective. You can utilize a remote shutter release or a self-timer to trigger the camera without touching it.
Set Light
Set up your lights and light modifiers around the table according to your chosen lighting setup. Test the lights and adjust the position and power until you get the optimal exposure and lighting on the product and the backdrop. You can use a light meter or a histogram on your camera to check the orientation.
Placing Products When Shooting With White Background
When placing the products on a white background, you will need to consider the following factors:
The product orientation:
You can place the product horizontally, vertically, or diagonally, depending on the shape and size of the product and the composition you want to achieve. You can also rotate the product to show different angles and sides of the product.
The product arrangement
You can place the product alone or with other products, depending on the purpose and message of the image. You can also use props, such as flowers, plants, or accessories, to add context and interest to the picture. However, avoid using props that are too colorful, busy, or distracting, as they can take away the attention from the product.
The product spacing:
You can place the product close to the edge or the center of the frame, depending on the crop and the format you want to use. You can also leave some space around the product to create a sense of balance and harmony.
How To Create a White Background in Photoshop
After you have taken the photos, you can use Photoshop to edit and enhance them. One of the most common tasks is to create a white background, especially if the original background is not pure white or has some imperfections. Here is how you can create a white background in Photoshop:
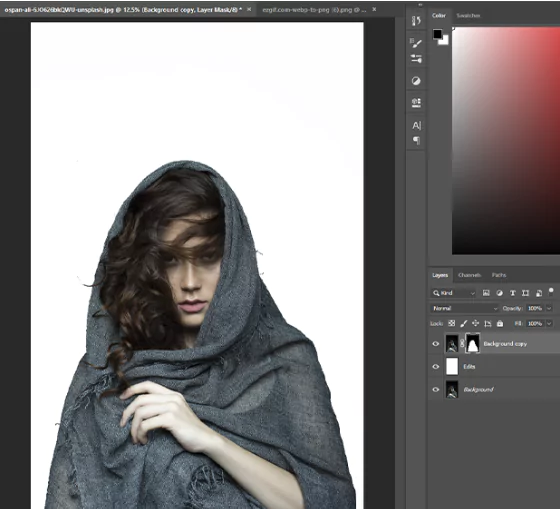
Step 1: Go to Photoshop and make a new layer. Give it a name.
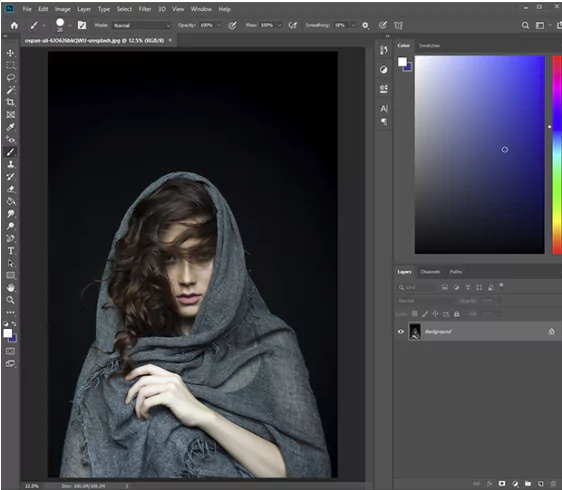
– Go to Image > Adjustments > Levels and move the sliders to make the layer white.

– Make a copy of your photo by making another new layer.
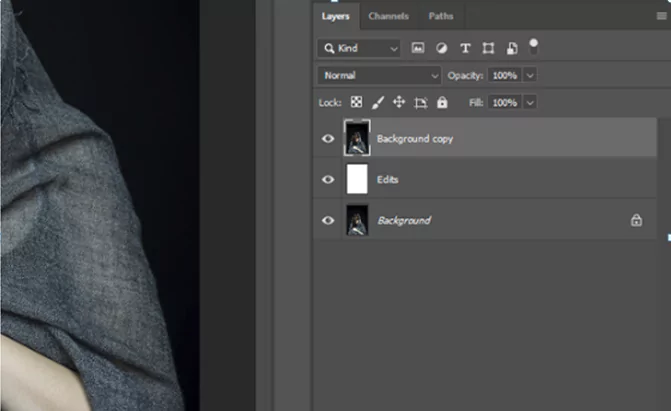
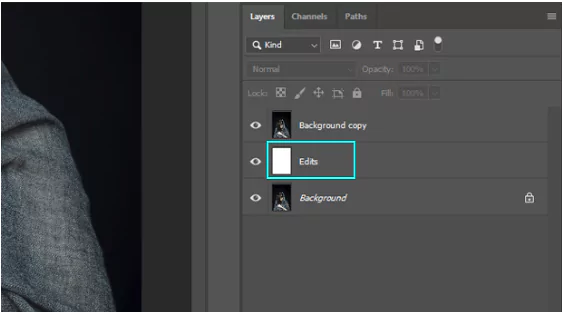
– Move the layers on the right side and put the white layer in the middle of the two photo layers.
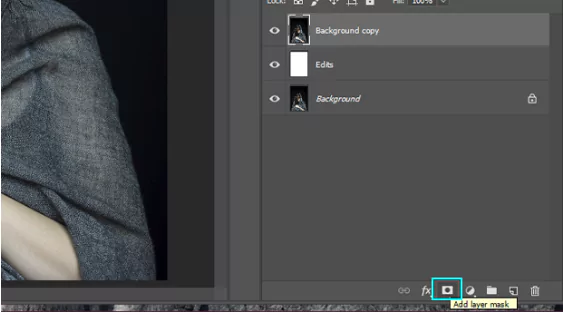
– Click the button in the bottom right corner to add a Layer Mask. You should see the white layer connected to the top photo layer.
– Pick a Hard Round brush from the Brush Tools Panel, make it 100% opaque, and make it black in the Tools Panel.
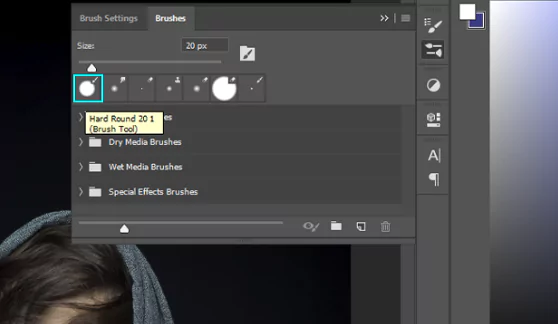
Click the Layer Mask, and use the brush to paint the mask and show the white layer. Paint the white layer around your subject by making the brush bigger or smaller and zooming in.

Press the X button from your keyboard to change to white, and paint over your errors if you have any. When you are done painting the white layer, save your photo by pressing CTRL + S on your keyboard.
How To Use AI for White Background Product Photography?
If you want to create professional and stunning product photos with white backgrounds, you don’t need to spend much time and money on expensive equipment and software. You can use ZMO.AI Background Changer, an online tool that uses artificial intelligence to change the background of any image in seconds. With ZMO.AI Background Changer, you can easily remove the original background of your product image and replace it with a pure white background or any other background of your choice.
Go to the ZMO.AI website and select the AI Background Changer option from the menu.

Upload the product image you want to edit. You can drag and drop the file or click the upload button to browse your device.

Wait a few seconds while the AI Background Changer analyzes your image and removes the original background. You will see a transparent background behind your product.
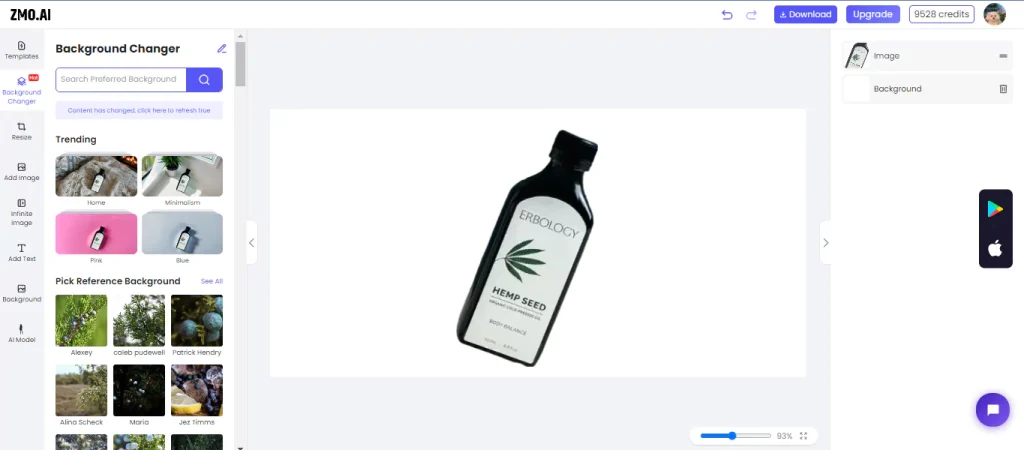
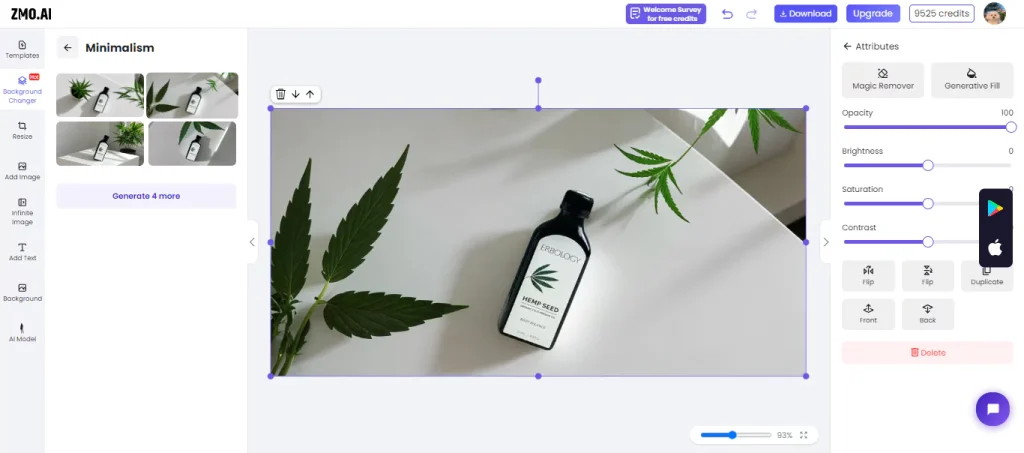
Choose the white background option from the background library on the right side of the screen. You can also adjust your product image’s brightness, contrast, and saturation using the sliders below the background library.
If you want to change the background to something else, select a different background from the library, upload your background image, or describe your desired background using free-form text input. The AI Background Changer will generate a realistic background that matches your description and blends with your product image.
Once you are satisfied with the result, you can download the final image by clicking the download button on the top right corner of the screen.
Conclusion: White backdrop for photos
Employing white backdrop product photography offers a streamlined, professional aesthetic ideal for e-commerce and advertising. This article comprehensively outlines the equipment and steps for shooting on a white background, emphasizing the importance of lighting setup and product placement. With a user-friendly interface, ZMO.AI swiftly replaces backgrounds, offering a cost-effective alternative to traditional methods. Embracing this innovative tool can save time and resources while ensuring high-quality, professional results.