
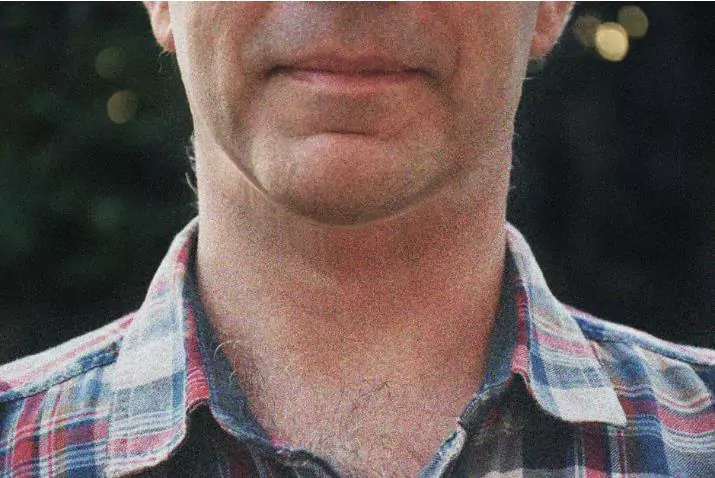
In portrait photography, achieving a flawless look is essential for client happiness. Snapping that perfect shot involves more than just pointing and shooting; it requires the proper lighting, a high-quality camera, and the best settings for capturing portraits. Even with all these elements, photographers often encounter the tricky issue of a double chin in their subjects. But don’t worry; there’s a solution for post-processing with Photoshop. Wondering how to tackle a double chin using this powerful tool? Look no further! In this easy-to-follow article, we’ll guide you through a Photoshop tutorial designed to help you smoothly remove a double chin from any portrait, ensuring your photos look their best. Let’s dive in detail of remove double chin photoshop without any delay!
How to Remove a Double Chin
Method 1: Photoshop
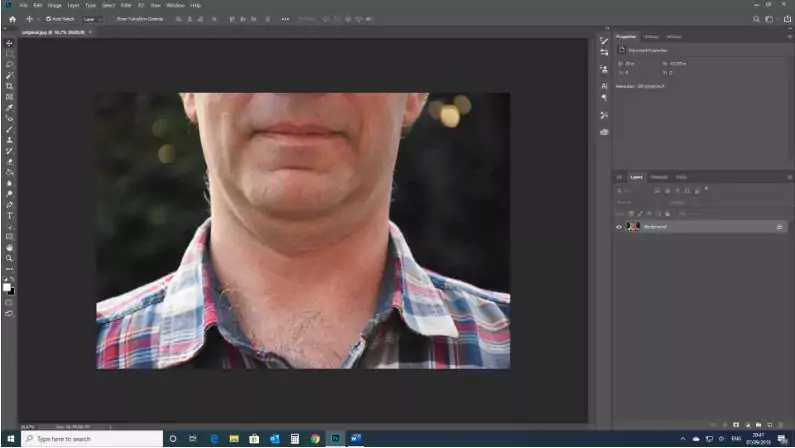
Step 1: Start by Opening Your Picture: First, let’s open your picture in Photoshop. Open Photoshop, then click on ‘File’ at the top, choose ‘Open,’ and pick the picture you want to work on from your files.
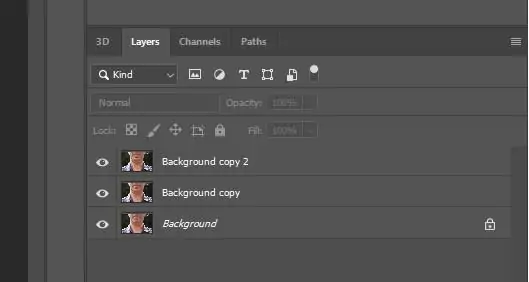
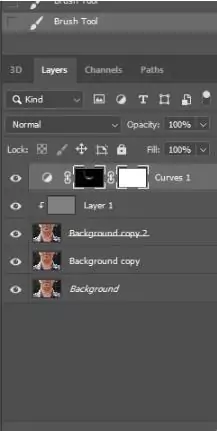
Step 2: Make Copies of Your Picture: Let’s make some copies once your picture is open. This way, if you make changes, your original picture stays safe. Just right-click on the picture’s layer and choose ‘Duplicate Layer.’ Do this twice so you have two extra layers. Don’t worry; this doesn’t change how your picture looks; it’s just a safety step.
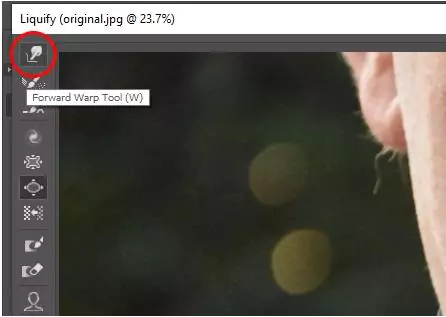
Step 3: Pick the Liquify Tool: To smooth out the double chin, we’ll use the Liquify Tool. Find it by going to the top menu, clicking ‘Filter,’ and then clicking ‘Liquify.’ You can press ‘Shift + Ctrl + X’ on Windows or ‘Shift + Cmd + X’ on a Mac.

Step 4: Select the Forward Warp Tool: After opening the Liquify Tool, look for the Forward Warp Tool. It’s the first icon in the list on the left side of the screen. You can also press the ‘W’ key to quickly select it.
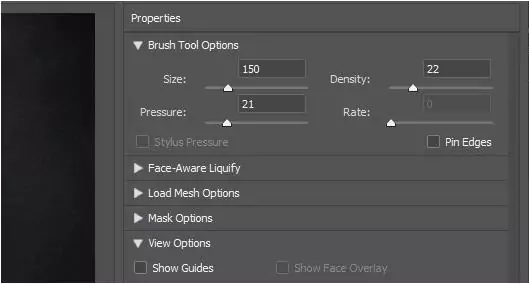
Step 5: Change the Tool’s Settings: Before we start editing, we might need to adjust our tool a bit. You can change how the tool works by playing with settings like Size, Density, Pressure, and Rate. Each picture is different, so try different settings to see what looks best on yours. I’ll show you the settings I used as an example.
Step 6: Edit with the Forward Warp Tool: Now it’s time to fix the double chin. Click and drag your mouse on the parts you want to change. The more you use the tool, the easier it gets. Just remember, don’t overdo it. You want to make sure it still looks real and not over-edited.
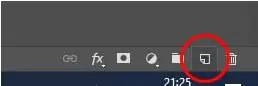
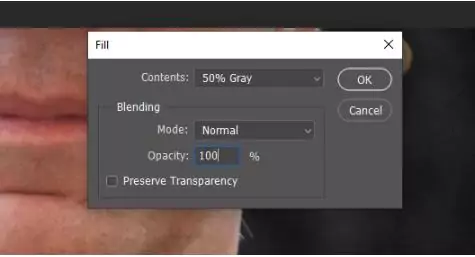
Step 7: Start a New Layer for Texture: Now, let’s get ready to add some texture to your photo. First, we need a new layer just for that. Click the little icon near the bottom right of the layers box to make a new layer. Or, use ‘Shift + Ctrl + N’ on Windows or ‘Shift + Cmd + N’ on a Mac.
Fill this layer gray by heading to Edit > Fill.
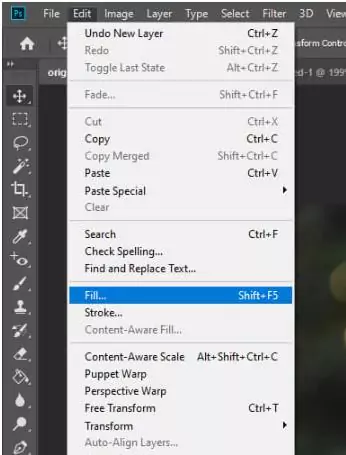
Step 8: Fill the New Layer with Gray: After you click to make a new layer, a window will show up for you to choose the fill settings. Here’s what to do:
- For ‘Contents,’ pick ‘50% Gray.’
- Keep the ‘Mode’ as ‘Normal.’
- Set ‘Opacity’ to ‘100%.’
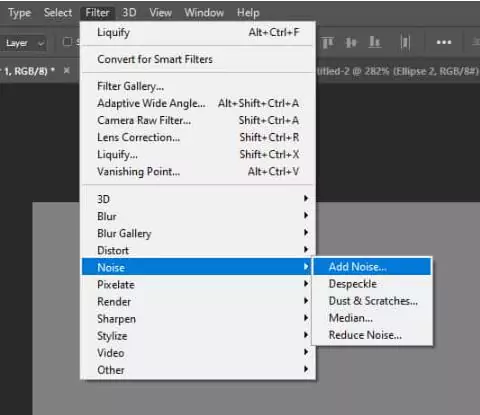
Step 9: Put Noise on the Gray Layer: With our gray layer ready, let’s add some noise. Go to ‘Filter,’ then ‘Noise,’ and choose ‘Add Noise.’
Step 10: Soften the Noise: To make the Noise look gentler, we’ll blur it a bit. Click ‘Filter’ at the top, then ‘Blur,’ and pick ‘Gaussian Blur.’ This will smooth out the Noise so it’s not too strong.
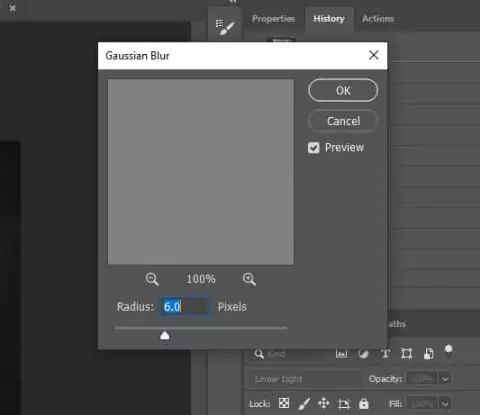
Step 11: Adjust the Blur and Blend Mode: When you choose ‘Gaussian Blur,’ a window pops up to set the blur amount. Pick a blur value that looks good with your picture size. A bigger value means more blur, making the noise effect subtler. Play with it until it looks right to you. Then, set the layer’s blending style to ‘Linear Light’ to get the textured look you want.
Step 12: Make a Clipping Mask: Now, let’s attach a clipping mask to your layer. Right-click on the layer and click ‘Create Clipping Mask.’ This will link the layer with the one below it.
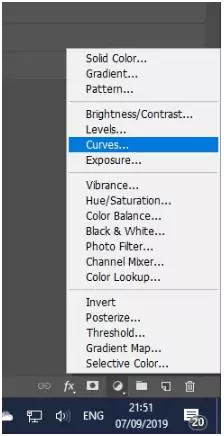
Step 13: Add Shadows for Realism: Now that the double chin is gone, we can make the photo look even more natural. Adding shadows under the chin and on the neck will help a lot.
For this, we’ll use a Curves Adjustment Layer. Click the fourth icon from the left at the bottom of the layers panel to add this layer, then choose ‘Curves’ from the menu.
Step 14: Darken with Curves for Shadow: Effect Let’s darken the image where shadows should be. We’ll use a Curves Adjustment Layer for this. When you add this layer, a window will pop up. You can make the image darker or lighter by adjusting the curve. Don’t hesitate to experiment with the curve to see how it changes the look of your photo.
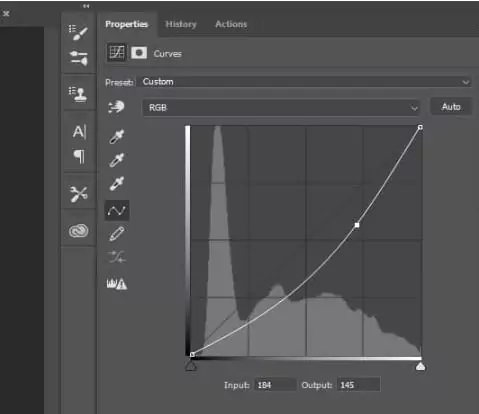
Step 15: Darken Parts of the Image and Use Layer Masks: To add shadows, darken your image by adjusting the curve. Then, use a Layer Mask to apply the darkening only where needed. Click the third icon at the bottom of the Layers panel to add the mask, then use the paint bucket tool (G) to fill it with black. Paint with white on the mask where you want shadows, like under the chin.
Step 16: Brighten for Highlights: Just like we added shadows, we’ll now brighten some areas to make the photo look even better. Do the same thing you did in step 10, but this time, adjust the curve to make the image lighter where you want highlights.
Method 2: ZMO.AI Photo Editor
In the digital age, where every picture tells a story, ensuring that your best self is presented can be a click away with AI-powered photo editing tools. One such marvel is the ZMO.AI Photo Editor, a user-friendly platform that transforms your photos swiftly and efficiently.
Gone are the days of laborious Photoshop techniques that require time and expertise. With ZMO.AI Photo Editor, even beginners can achieve professional results quickly. The tool stands out for its simplicity and effectiveness, especially when refining portraits. If you’re looking to remove a double chin, this AI editor is your go-to solution.
Here’s how you can effortlessly enhance your image:
Navigate to the ZMO.AI website and select ‘AI Photo Editor’ from the menu.

Click on ‘Try AI Photo Editor’ to begin.

Upload the photo you wish to edit.

From the right-side panel, choose the ‘Magic Remover’ tool.
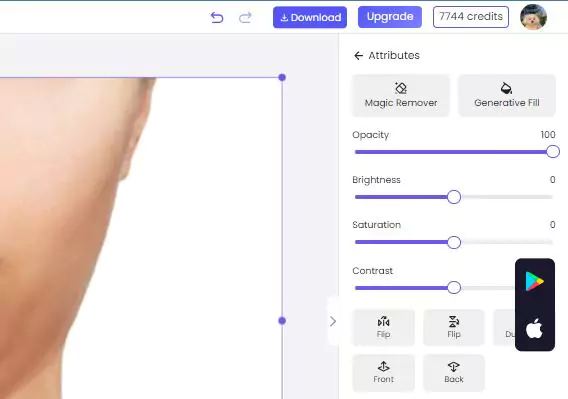
Use your mouse to select the double chin area.
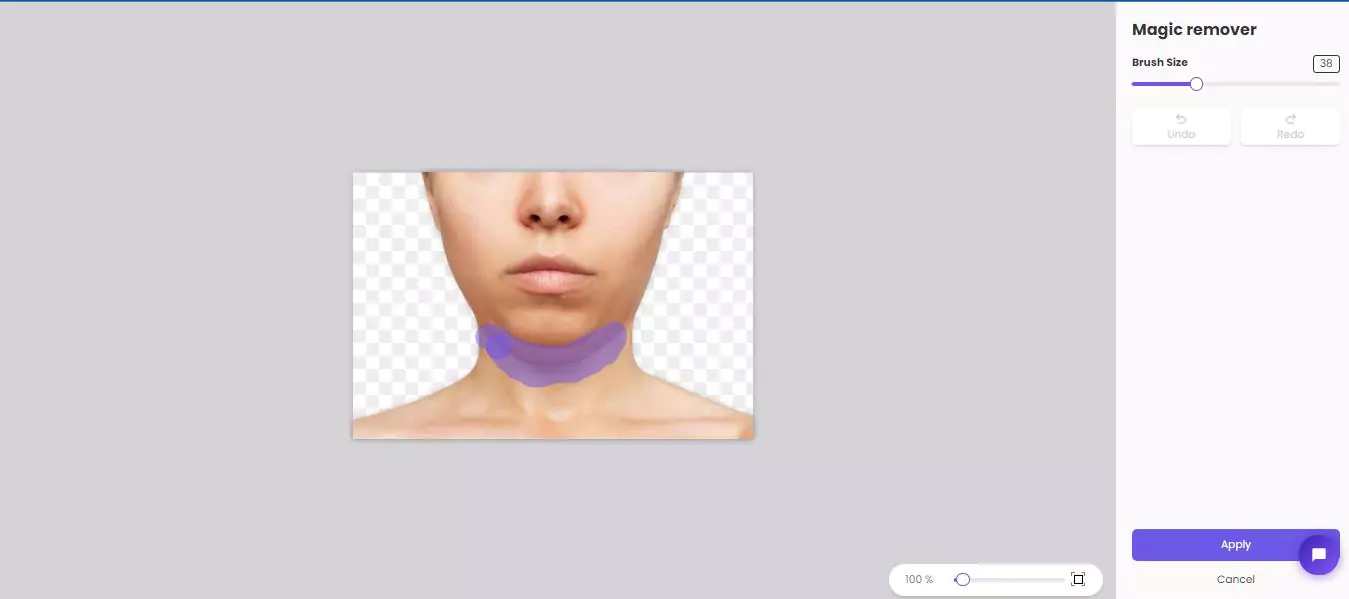
Like magic, the AI will seamlessly remove the double chin.
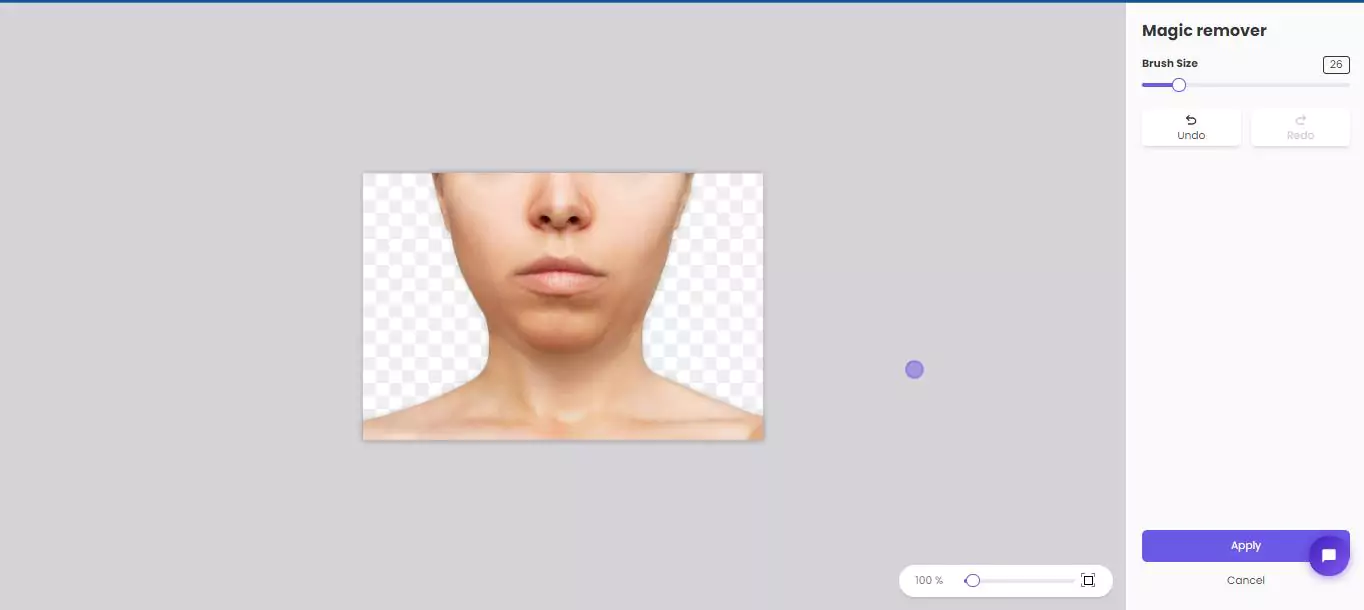
Hit ‘Apply’ to confirm the changes.
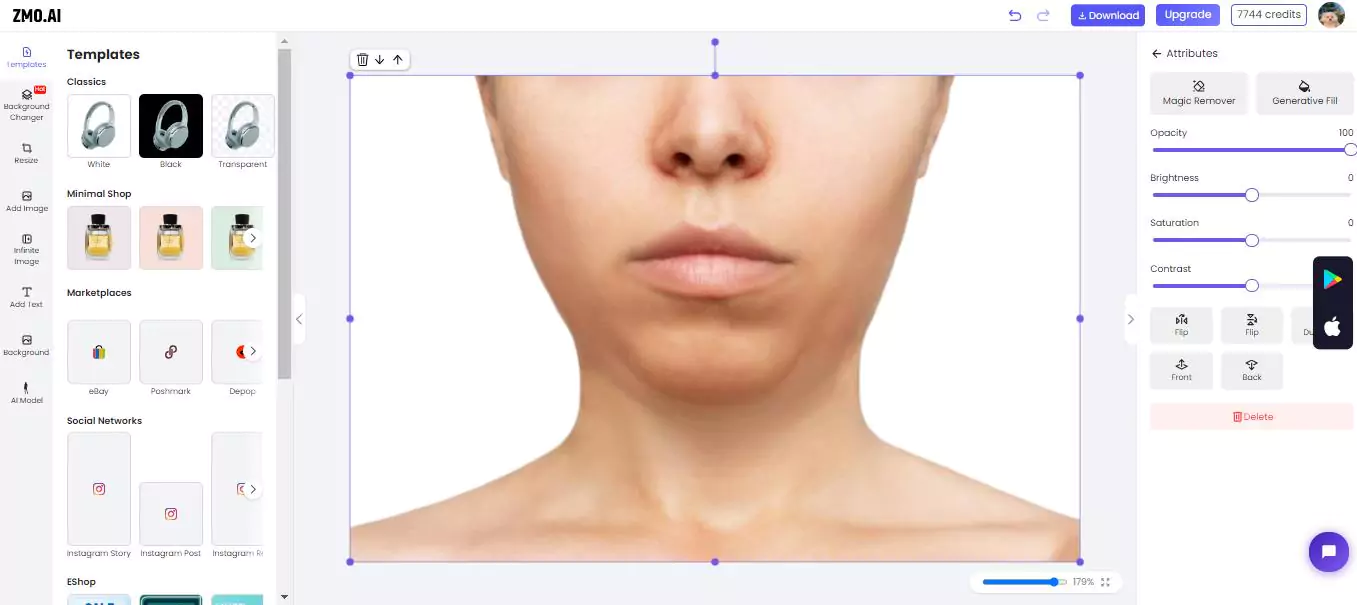
But why stop there? The ZMO.AI Photo Editor offers many editing options to personalize your image further. Change the background for a fresh look, or adjust the contrast to make your photo pop. The possibilities are endless, and the process is incredibly intuitive.
In just a few minutes, your edited image is ready to be downloaded and shared with the world. Whether for a professional LinkedIn profile or a casual Instagram post, ZMO.AI ensures your photos look their best. Try it out and watch the transformation unfold right before your eyes.
FAQs
Can I use ZMO.AI Photo Editor on mobile devices, or is it only available for desktop use?
ZMO.AI Photo Editor may offer compatibility with desktop and mobile devices, providing users flexibility and convenience. Users can access the platform via web browsers on their desktop computers or a dedicated mobile app (Creati) for smartphones and tablets.
Can I undo changes made with ZMO.AI Photo Editor if I’m not satisfied with the results?
Yes, ZMO.AI Photo Editor allows users to undo changes if they are unsatisfied with the results. The platform typically includes an undo button or a history panel where users can revert to previous versions of their edits.
How does ZMO.AI Photo Editor ensure the privacy and security of user data during the editing process?
ZMO.AI Photo Editor typically employs robust security standards to safeguard user data and ensure privacy throughout editing. This may include encryption protocols, data anonymization techniques, and adherence to industry-standard security practices to protect sensitive information from unauthorized access or breaches.
Conclusion: Remove double chin photoshop
In the world of portrait photography, achieving flawless results is paramount. While Photoshop offers practical solutions, it demands expertise. Enter ZMO.AI Photo Editor – an intuitive, AI-powered tool that makes professional editing accessible to all. Removing double chins and enhancing portraits becomes effortless, even for beginners. With its user-friendly interface and advanced features, ZMO.AI ensures stunning results in no time. Say goodbye to complex editing techniques and hello to seamless transformations with ZMO.AI. Whether for professional profiles or social media, it’s your go-to for impeccable photos. Try it today and experience the magic firsthand!