
You take an aesthetic picture but it needs cropping to become perfect. You want to upload your picture on social media but the size of your image is large. In this situation, you need to resize your pictures.
A lot of people wanted to resize their pictures but they didn’t know how to do it. A lot of Mac users specifically have this issue because they find the device a bit difficult to understand. Especially those people who have recently bought a new Mac. They need tutorials for everything.
So, in this article, I am going to tell you different ways of How to Resize a Picture on Mac without losing its quality.
Guidance for How to resize a picture on Mac?
There are two popular ways of How to Resize a Picture on Mac. One popular method is through the Preview tool and the other one is through ZMO AI photo resizer. I will share both procedures with you along with their features so that you can make an educated decision while selecting a picture resizer next time.
Resizing on Mac Through Preview
The best thing about Preview is that it is a default tool. You don’t need to install any additional software on your Mac.
Moreover, it is free and easy to use so you don’t need to spend any effort or time resizing your images on this tool. You can also edit multiple pictures on it at the same time if you want.
So, let’s see the tutorial for it.
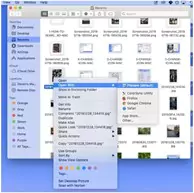
- First of all, you need to select the pictures which you want to edit. You can find it through your Finder tool which is a half-toned face icon in your bottom toolbar. If your pictures are on your desktop, you can highlight one or more pictures you want to edit.
- When you open your pictures, you can see the “Preview” option in the right-hand corner. It will be there when you have this tool by default. It means your pictures will always open in this tool automatically. But, if it is not your default app, then you need to right-click on your picture. A menu will come from which you need to select “Open With”. In it, you will find the Preview option.
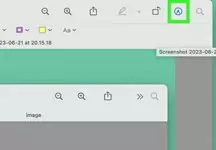
- You need to click on the edit button to switch to edit mode. This button is on the top in the form of a square with a pencil. When you click on it, a new toolbar will appear on the top.
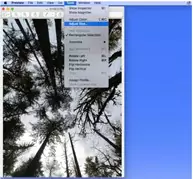
- Now, on the top of it, you can see the “Tools” option. When you click on it, a drop-down menu will come in front of you. From that menu, you need to select the “Adjust Size” option.
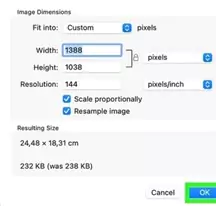
- A pop-up menu will come on the screen when you click on it. Here, you can write your image’s width, height and resolution. To have a high-quality picture, you should keep the resolution high. Social media platforms have default resolution so you can search their resolution requirement on Google. With it, you can see the “Fit into” option too. If you want to select from any preset template, you can do it from here.
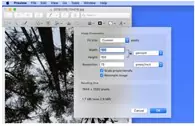
- Now, after doing all the settings you want, you need to click on the “OK” button. In this way, you can see your resized picture.
- For downloading it, you need to select the “File” option on the top. When you click on it, a drop-down menu will come up. From that menu, you select the “Save” button. In this way, your edited file will be saved.

So, this is the method of saving pictures through Preview. Now, you must be wondering about the second way. So, let’s see it.
Photo Resizing on Mac through ZMO AI photo editor
It is a free AI tool that saves a lot of your time and effort in manual resizing which you have to do in Preview. It has a user-friendly interface and costs nothing. The best thing about this tool is that it has presets for each social media platform and marketplace, ensuring that you never make any mistake in resizing your pictures for social media.
With it, this AI photo editor also has advanced features. These are photo background changers, removing any object from the background, adding any text in the picture, and so on. You can download the app on your Mac and iPhone too. Moreover, you can use its website too for How to Resize a Picture on Mac. Due to these advanced AI tools, a lot of marketers and eCommerce owners prefer ZMO.
Let’s discuss the tutorial now.
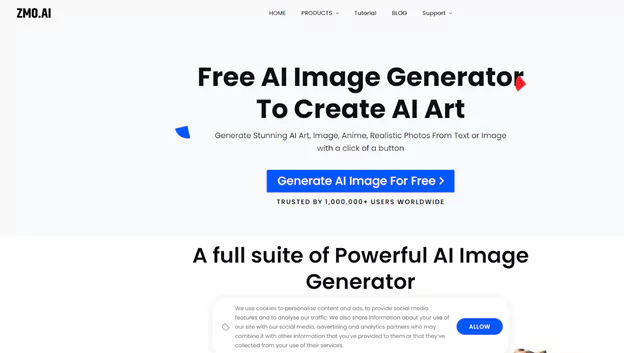
First of all, you need to go to ZMO.AI on Google and sign up there.
Now, you will see the “Products” option on the top. You need to select it.
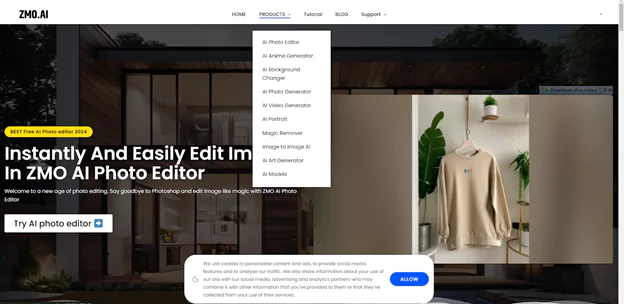
A drop down menu will come in front of you. In it, you can see an AI photo editor on the top. Click on it.
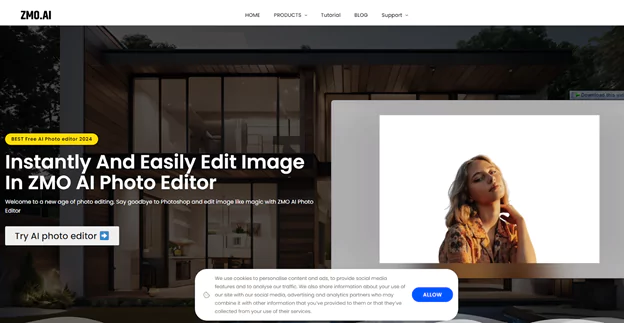
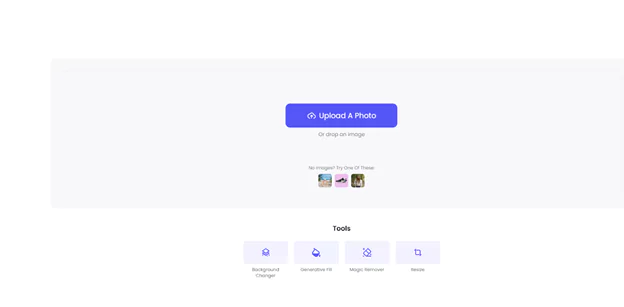
This will take you to a new page. On this page, you can see the option “Try AI photo editor.” Click on that option. It will take you to another page.
In this page, you can see the “resize” option on the page below. When you click on the Resize button, it will ask you to upload a picture. So, you need to upload the photo from your Mac.
Now, a new interface will come. In it, you can see the “Social Media Sizes” option in the side menu. You will see different social media preset options under that heading.
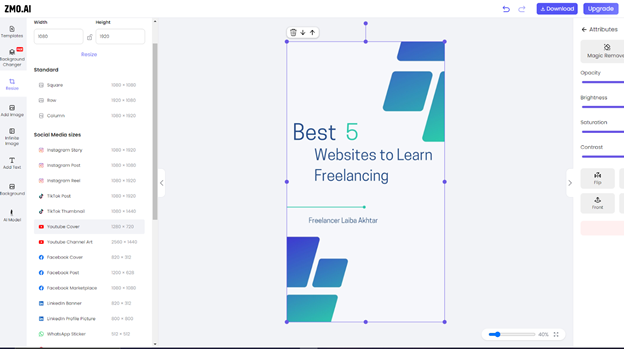
In this tutorial, I am going with the YouTube cover option. In the above picture, you are seeing the size of the original photo I uploaded from my Mac. Now, I will click on the YouTube cover option. After clicking it, the final result will be:
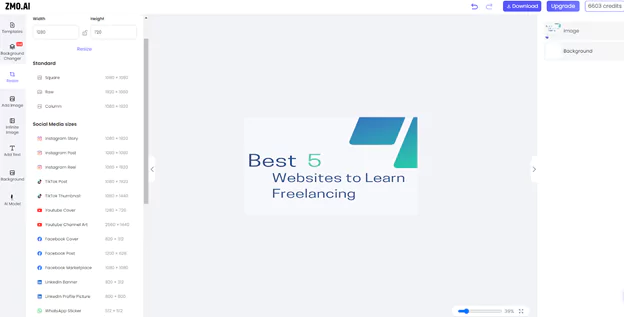
This is it! My picture is ready to upload on YouTube. I don’t have to do any manual settings here as AI has done everything for me. I just need to click on the download button and it will download my picture on my Mac.
Comparison Table of Preview and ZMO
| Features | Preview | ZMO |
| Built-in | Yes | No |
| Advance tools | No | Yes |
| Easy to Resize | Slightly difficult | Yes |
| Free to use | Yes | Yes |
| Other Editing features | Not much | A lot of them |
| Multiple Pictures Resizing | Yes | No |
This comparison table may have told you how much ZMO is superior to Preview. You may have noticed in tutorials that ZMO needs only a few clicks while Preview needs a lot of manual editing. That’s why Mac users mostly prefer ZMO over the default tool.
Case Studies of Resizing Photos on Mac
You may be wondering why you need to resize photos on Mac. In which situations is it important? Well, I am going to discuss a few case studies and reasons with you.
1. Uploading Photos to Social Media and Website
You need to upload your photos to social media platforms. You try to upload it but the size of your picture is large so the platform is automatically cropping it, making it less appealing. Or, the file size of your picture is too large that the platform is not accepting it. In this situation, How to Resize a Picture on Mac according to the social media platform requirement. It will solve the file size issue too.
In the tutorial of ZMO, you have seen how I edit the picture according to the YouTube cover sizing requirements. You can do the same.
2. Sharing Pictures in Email
You want to share your picture by email. However, the file size is too large that the email is slow to process or bounce back. In this situation, you can resize your picture to attach it to email.
3. Save Storage on the Mac
Your images are taking a large amount of storage on Mac. You have no space left but you don’t want to delete pictures. In this situation, the common question is How to Resize a Picture on Mac. You can make them small so that their file size decreases. In this way, they will not take much of the storage.
4. Consistent Image Sizes for eCommerce Store
You want to build an eCommerce store or website. Now, the images of different sizes on the website will not be visually appealing. You need to make sure that your product pictures are of the same size on your website. So, you should resize them according to uniform size requirements. It will give a professional look to your store.

FAQs
How to resize a picture on Mac without losing quality?
You can use Preview or ZMO for reducing file size on Mac.
Is ZMO safe to use?
Yes, this tool has strong security policies and software that ensures your personal data is safe.
Can I resize multiple photos on Mac?
Yes! You can do it through the Preview tool.
Conclusion
How to Resize a Picture on Mac is crucial in a lot of personal and professional situations. A lot of people panic about it because they think this process is complicated. But this is not true. ZMO and Preview tools have made it a lot easier to resize photos. In fact, ZMO only requires a few clicks and will give you a high quality resized picture. So, do try this tool for resizing pictures on Mac next time.