

In the digital world we live in, photos are a primary way to showcase your brand and its products. For most online retailers, that means photo shoots of your clothing. But, as anyone who has ever planned or attended a photo shoot can attest — or stumbled across one on social media — creating compelling photos of clothes is challenging, even for professionals.
With models and stylists often costing you time and money to book (not to mention their travel expenses), it can be tricky to get high-quality images at home. Furthermore, unless you have a constant stream of willing friends and family members who are also trustworthy with your company’s garments, finding someone new every time you need new photos is difficult.
But don’t let that stop you! In this article, we’ll cover five ways to create stunning clothing images without a model as well as tips for making the most out of any photo shoot you do have. So read on if you’re ready to take your clothing photos to the next level…
5 ways to create stunning clothing images without a model
Use a Mannequin or Dress Form
If you’re selling clothes on your website, then you likely already have a mannequin or dress form. These are fantastic for taking photos of clothing because they provide a realistic shape that the clothing can hang off of. And, if you don’t have one already, they’re relatively inexpensive to purchase (you can find them on Amazon for around $50).
When using a mannequin or dress form, there are a few things to keep in mind. First, be sure that the form is well-lit so that the clothing is properly illuminated. Second, if possible, use a white or neutral background so that it doesn’t compete with the clothing. And third, take multiple photos from different angles so that potential customers can get a good sense of the garment.
Use a Hanger
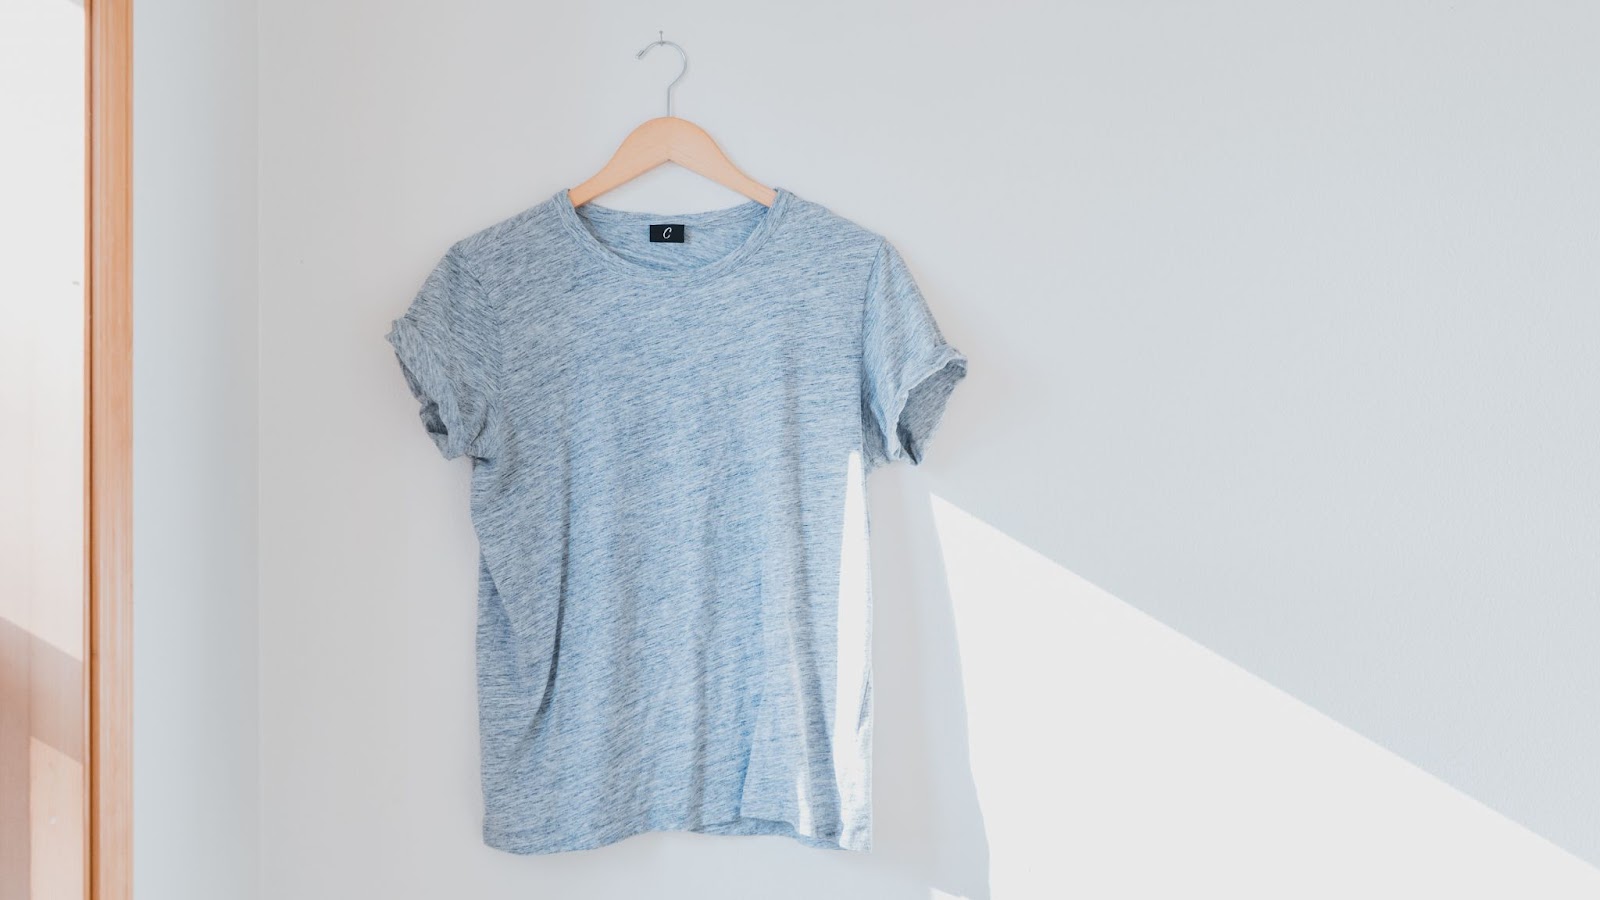 If you don’t have a mannequin or dress form, another option is to simply hang the clothing on a hanger. This is a great option for items like shirts, dresses, and pants — anything that can be hung up. To make this work, you’ll want to find a well-lit space with a neutral background (a blank wall works well). Then, using either natural light or studio light, take several photos of the clothing hanging from the hanger. Again, be sure to take photos from different angles so that potential customers can get a good sense of the garment.
Lay the Clothing Flat
 For items that can’t be hung up (like sweaters, jackets, and scarves), you can lay them flat on a surface. This works best on a neutral-colored background (again, a blank wall or sheet works well). Once you have your item laid out, take several photos from different angles. And, if possible, use some sort of weight to keep the clothing in place — like a stack of books or a bag of rice — so that it doesn’t move around while you’re taking photos.
Create a Ghost Mannequin Effect
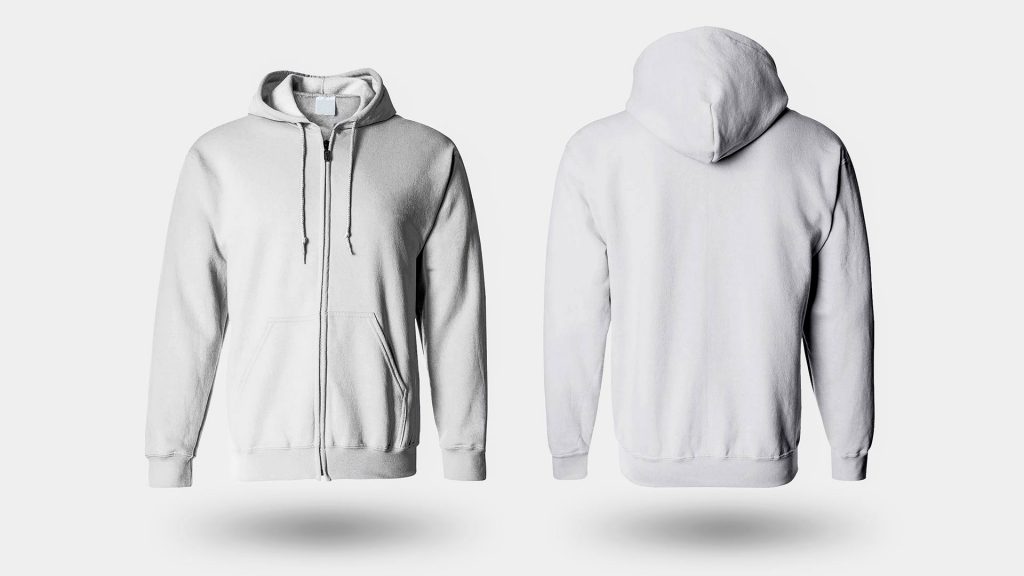 If you want to show off what the clothing looks like on a human body without actually using a model, then you can create a “ghost mannequin” effect. This is done by taking two photos of the clothing — one of the front and one of the back — and combining them in Photoshop or another image-editing program.
To get started, you’ll need to find a well-lit space with a neutral background. Then, using either a mannequin or dress form (or even just hanging the clothing on a hanger), take a photo of the front of the garment. Next, take a photo of the back of the garment. Once you have both photos, you can then use Photoshop or another program to combine them into one image.
This technique takes a bit of practice to perfect, but it’s a great way to show off what the clothing looks like on a human body without actually using a model.
Use AI-Generated On-Model Images
If you don’t have the time or resources to take photos yourself, another option is to use an AI-generated on-model image. This is where a computer program generates a photo of the clothing being worn by a model. While this may sound like something out of science fiction, there are a few different companies that offer this service (like ZMO.AI and Vue.ai).
To use this service, you simply upload a photo of the clothing to their website and then select what type of model you want to use. Then, within a few seconds, you’ll have a professional-looking image of the clothing being worn.
These are just a few of the many ways to create stunning clothing images without a model. So next time you need new photos, don’t let the lack of a model stop you — simply use one of these methods and you’ll be sure to get great results.
Tips for Making the Most out of Any Photo Shoot
While the above ways will help you create great photos without a model, there are a few additional things you can do to make sure your clothing photos are as stunning as possible.
- Find a well-lit space with a neutral background, like a blank wall or sheet.
- Lay out the clothing or hang it up on a hanger to avoid wrinkles.
- If necessary, use weights to keep the clothing in place, so it doesn’t move around while you’re taking photos.
- Take photos from different angles, so potential customers can get a good sense of the garment.
- Use props sparingly and make sure they complement the clothing.
- Edit your photos to make them look their best, but don’t go overboard with the filters.
- Consider hiring a professional photographer for complex shoots or if you need a large number of photos.
- Using proven techniques can improve the quality of your photos, like the ghost mannequin effect or AI-generated on-model images. If you don’t have a lot of experience with photography, these can be a great way to get professional-looking results.
By following these tips, you’ll be sure to create stunning clothing photos that will help sell your garments — no model required.