How To Use ImgCreator.ai?
With ImgCreator's text-to-image function, you are able to create stunning, unique masterpieces.
Generate
Text To Image:
Start by providing a detailed description of what you envision. Then, review and select the suggested categories and style for additional direction. If you prefer greater flexibility, freeform mode is also available. After choosing preferred canvas size, resolution, and number of images, two amazing pictures based on your specifications will be generated.

Image To Image:
To achieve a result that is tailored to your exact specifications, begin by uploading a reference image. Next, adjust the strength number of the reference image to determine how close the outcomes resemble the original image.
Third, select categories and styles relevant to your desired look or explore freeform mode for more unrestricted options. Once a preferred canvas size, resolution and number of resulting images are settled, the artwork pieces meeting your specific requirements will be generated.
.webp)
Image Variation: Make variation or help to find inspiration
Start by uploading a reference image. Then, customize the strength number to adjust how closely the generated images resemble the original reference. Finally, select desired quantity of output images and the artwork pieces meeting your specific requirements will be generated.
.webp)
Background AI: Generate realistic, studio-quality product images in seconds
Start by uploading a product image and AI will remove the background automatically instantly. You can choose to download transparent background or choose solid color background on the top left corner. And if realistic life-style background is needed, click 'Generate Background'.
.webp)
There are 3 flexible ways to generate background for product:
1. Choose pre-defined filters is the simplest way and you can choose different categories first, then choose various scenes on second row.
2. Freeform is most popular choice since it gave most freedom how you want to describe the background. Yet, some prompt engineering is needed there.
.webp)
3. Ref Image is by far most practical way to generate product image you exactly want. Simply find the matching background or popular background for your product, upload it in the ref background box below. Then you will need to resize and move your product to the correct size and position and hit create. After a few seconds, you will get the ideal product image you want.
.webp)
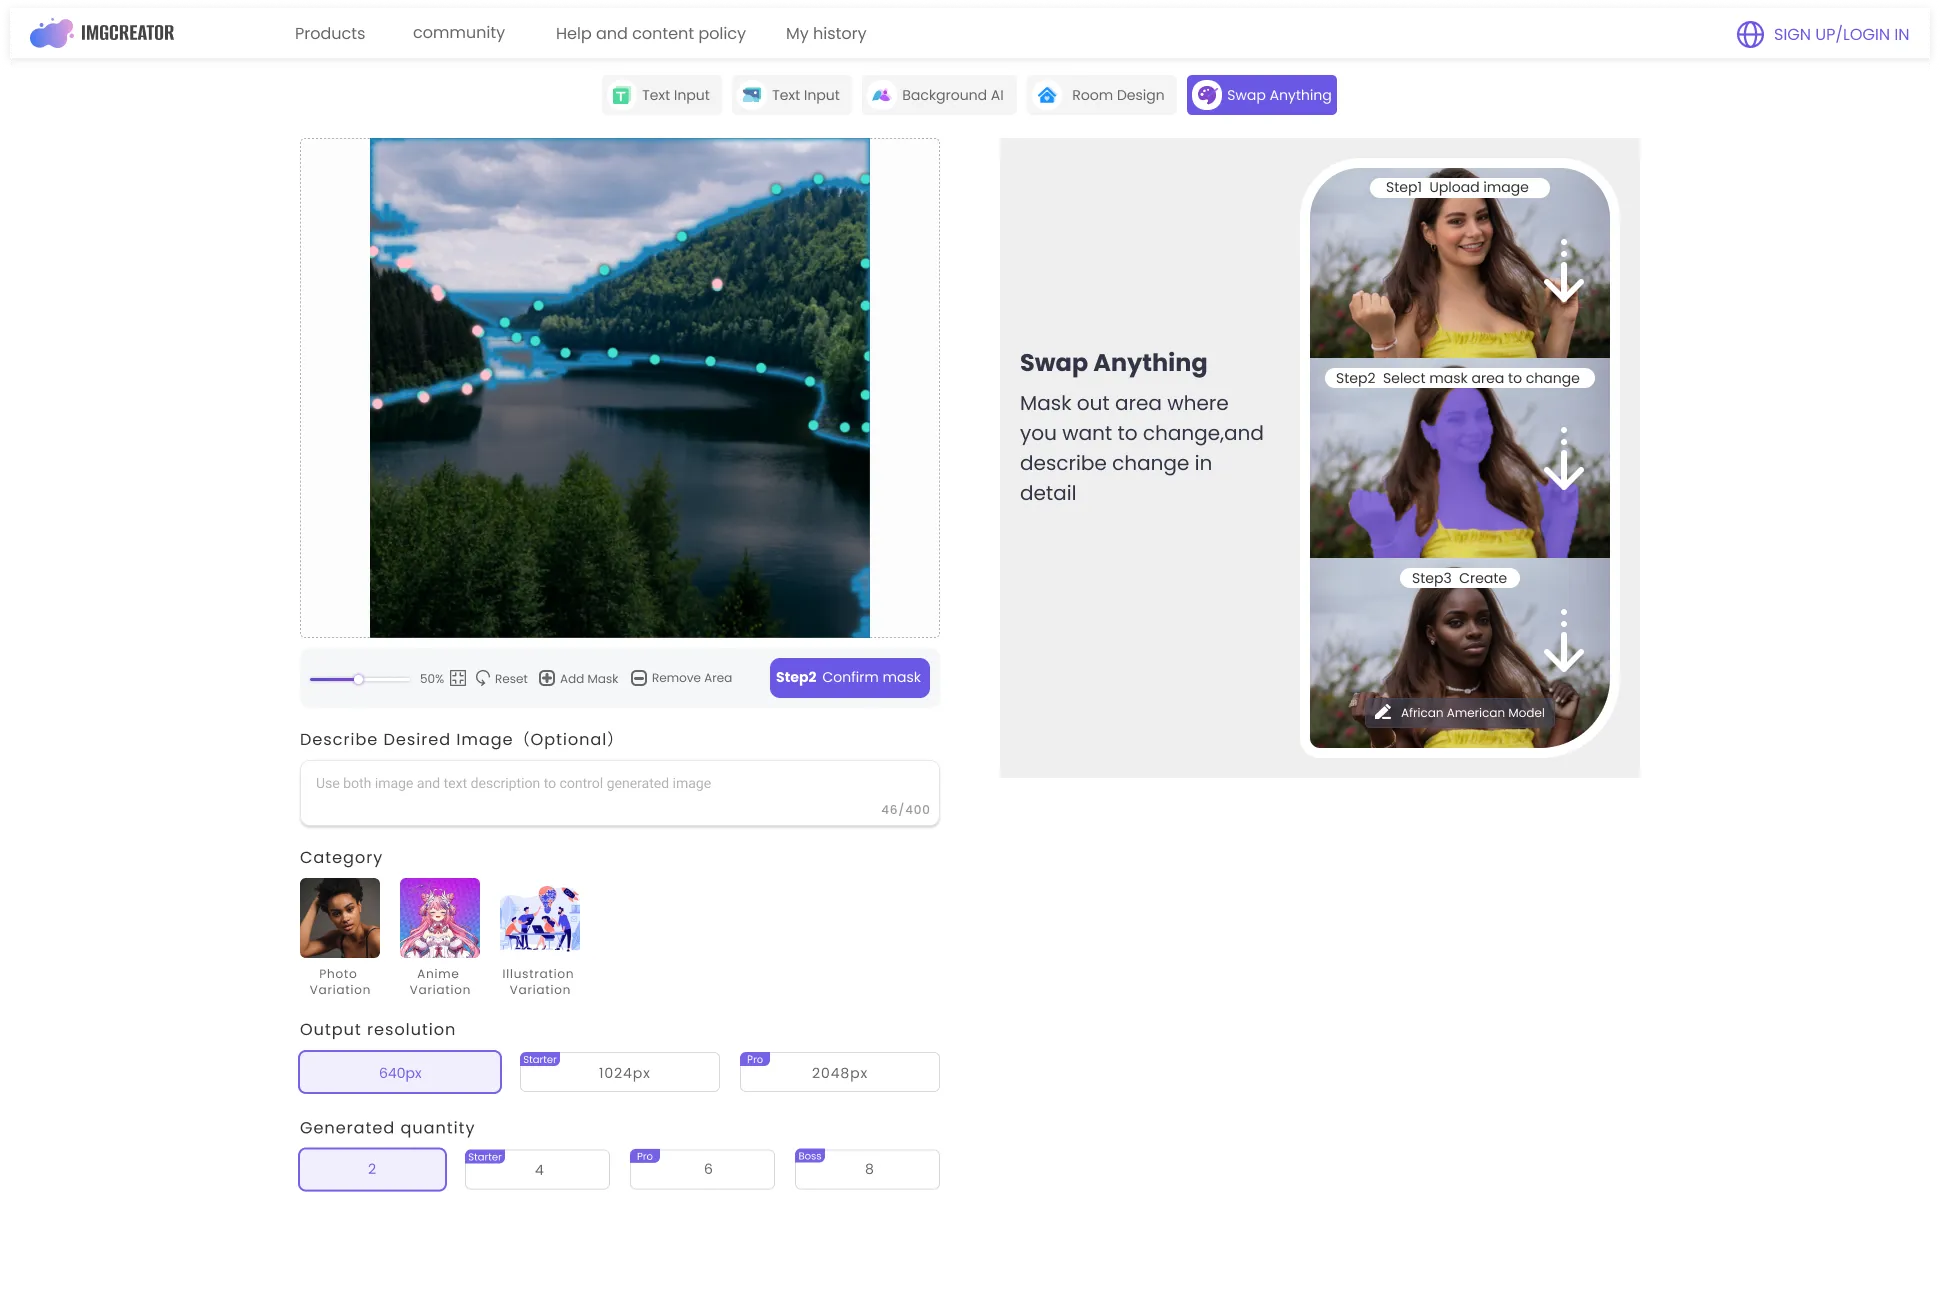
Swap Anything: Photoshop any image with one click
After image is uploaded, AI will automatically segment different parts and you can simply click on the mask area where you want to change. If you want to make selection more precise, you can use 'Remove Area' to click on the area you don't want (red dot), and 'Add Mask' to click on the area you hope to add (gree dot).

After mask is selected ready, hit 'confirm mask', (you can always go back to reselect mask choose button on the left side), type in description of the part how you want final result to be, and hit create. AI photoshop result will be ready in few seconds on the right.
.webp)
Image Results & Actions
Improve your images using four buttons.
.webp)
Restore: restore the flawed original picture
Enhance: add extra details to the original picture
Upscale: increase the resolution of pictures to 4k
Edit: change the background or anything else
Image History
To view your generated images, simply navigate to the 【My History】 tab located at the top of the page.
All image prompts and results will be stored here, allowing you to easily access, download or share them at any time without fear of forgetting to save them. Currently for free users, there will be limited storage in history and you can always upgrade to expand your storage for all valuable images.
.webp)